Remote Desktop Protocol is a proprietary protocol developed by Microsoft it provides a user can connect to another computer. This step-by-step tutorial covers how to enable Remote Desktop Protocol (RDP) on Windows Server 2022.
Table of Contents
- Enable Remote Desktop to connect to the Server from other Computers
- Connect to Remote Desktop session from Client OS.
Server Demo environment
- Computer Name: server1
- Operating System: Windows Server 2022 Datacenter
- IP Address: 192.168.3.3
Enable Remote Desktop to connect to the Server from other Computers
The default port number of Remote Desktop Protocol is 3389, Remote desktop service is disabled by default. To enable Remote Desktop in Windows Server 2022, you need to log in with a local administrator account to make the changes.
1. Open Server Manager, click on Local Server and Click on Disabled for Remote Desktop section.
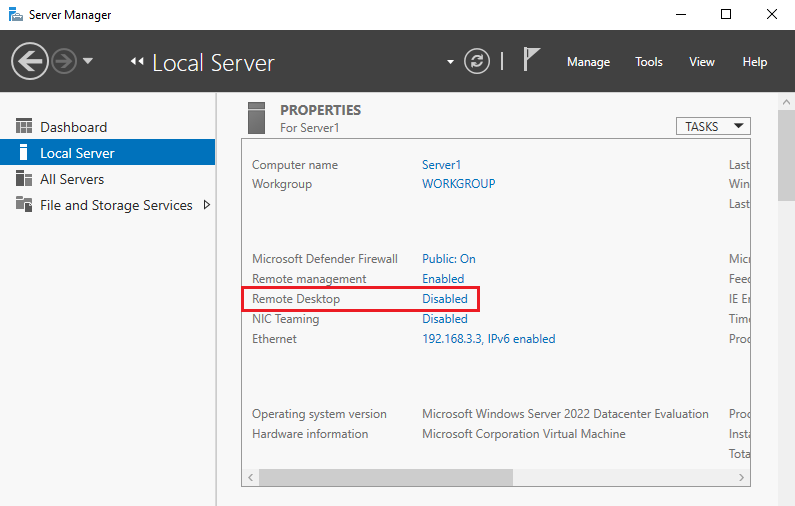
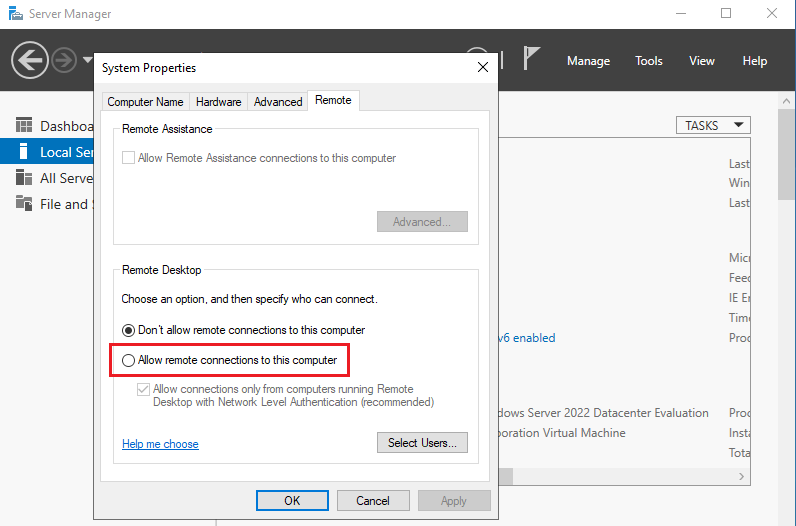
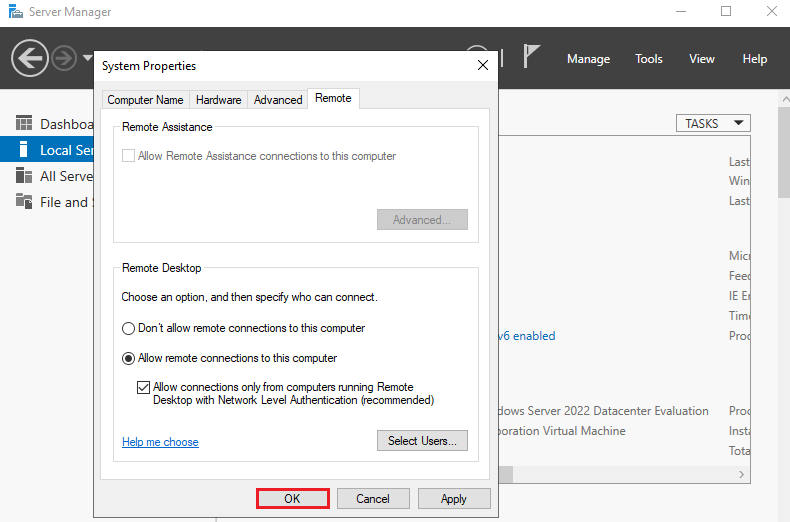
2. Select Allow remote connections to this computer.
3. The message that Firewall exception for Remote desktop is enabled, Click on OK.
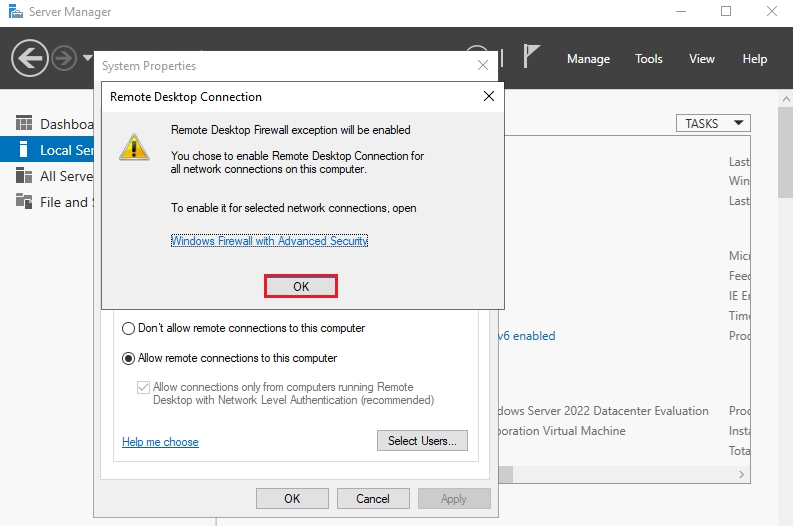
4. Ensure the option Allow connections only from computers running Remote Desktop with Network Level Authentication is enabled and click OK.
Connect to Remote Desktop session from Client OS.
Make sure the client and the server are on the same network.
Client Demo environment
- Computer Name: server2
- Operating System: Windows Server 2022 Datacenter
- IP Address: 192.168.3.4
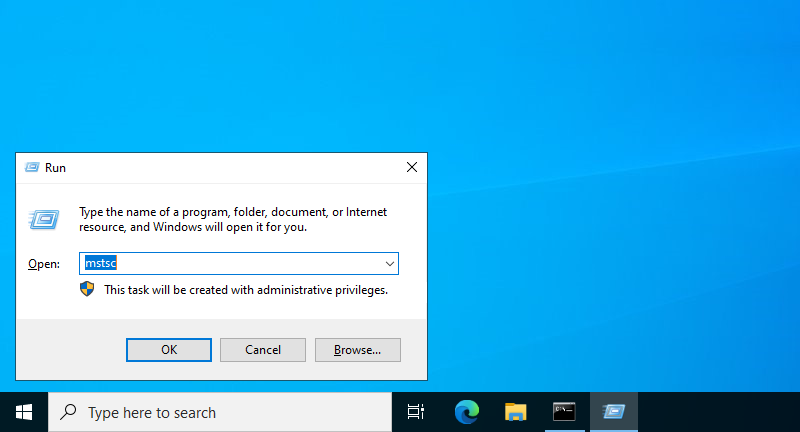
5. Right-click the Windows icon and open run and input mstsc and Click OK
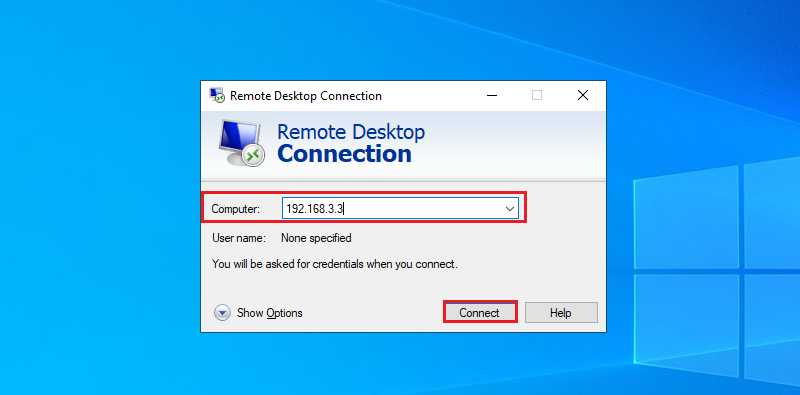
6. Enter the Hostname or IP address you’d like to connect to. In this tutorial, we use the IP address for connecting.
- Computer: 192.168.3.3
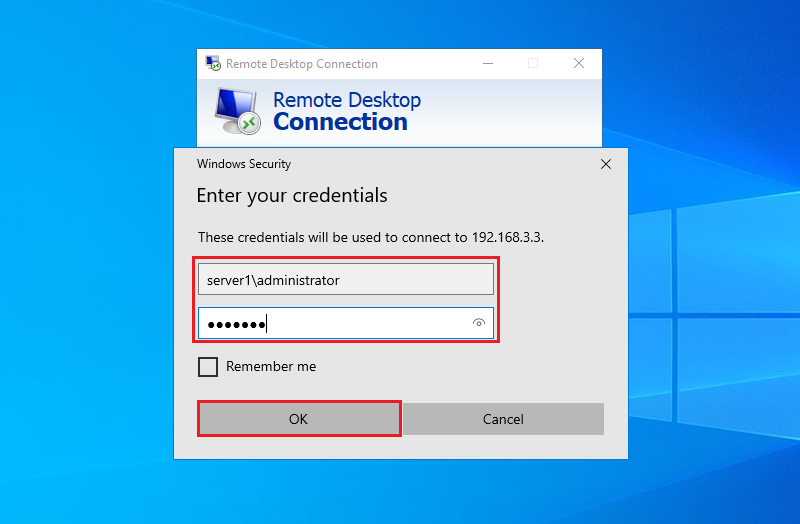
7. Enter the Username and Password of the remote server and click OK.
- User Name: server1\administrator
- Password: *******
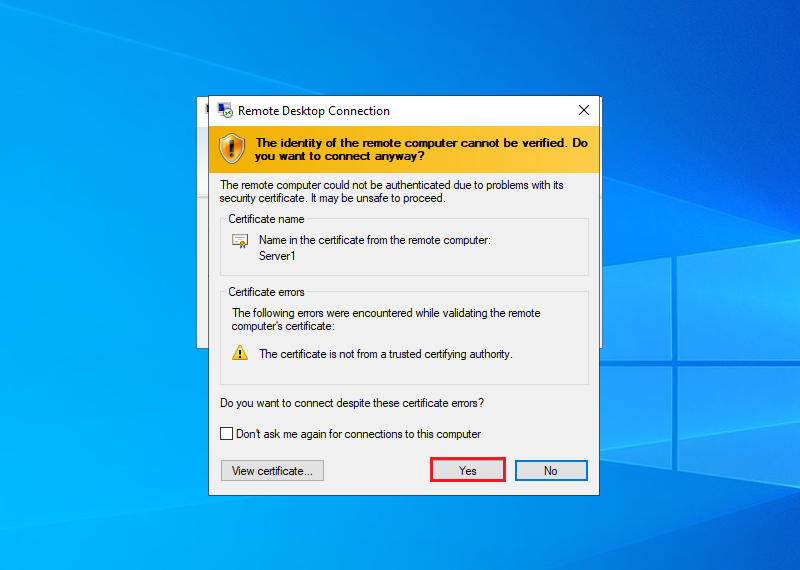
8. Click Yes.
