In this tutorial, we are going set wallpaper for windows clients via Group Policy in Windows Server 2022. Group Policy is a feature of the Microsoft Windows NT family of operating systems that controls the working environment of user accounts and computer accounts. Group Policy provides centralized management and configuration of operating systems, applications, and users’ settings in an Active Directory environment.
Demo environment
- Computer Name: server1.test.com
- Operating System: Windows Server 2022 Datacenter
- IP Address: 192.168.3.4
- Domain: test.com
- Current domain controller (DC): server1.test.com
- DNS Server IP address: 192.168.0.2
- Organizational unit: TEST_OU
- A user within Organizational unit (TEST_OU): test\user1
Steps for Configuring Group Policy
- Configuring Central Store GPO
- Create and configure Starter GPOs
- Create a GPO and Link
- Check the result on a client machine
Configuring Central Store GPO
The group policy central store is a central location to store all the group policy template files. This eliminates the need for admins to load and open group policy template files on systems used to manage group policy.
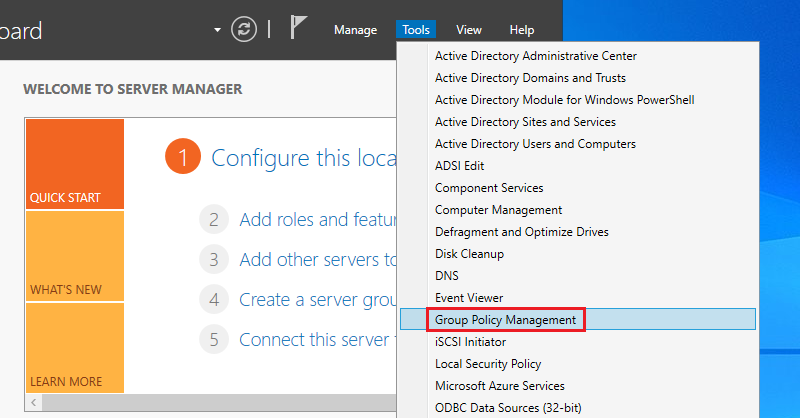
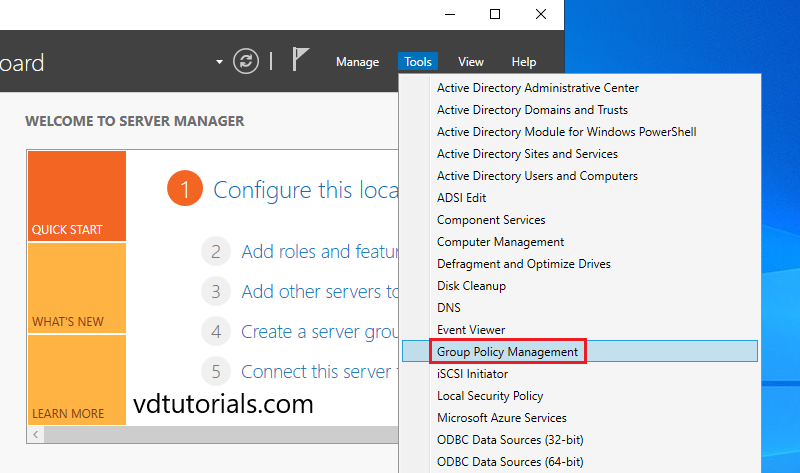
1. Open the Server Manager dashboard, click tools, and select Group Policy Management.
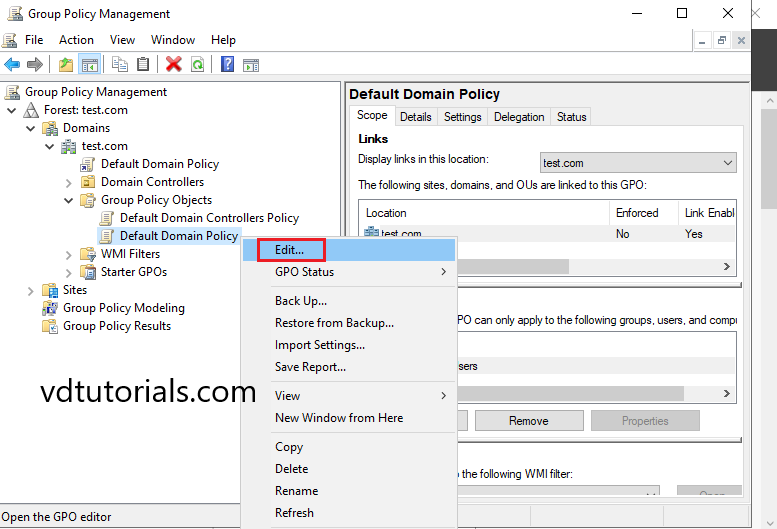
2. Right click on Default Domain Policy and select Edit.
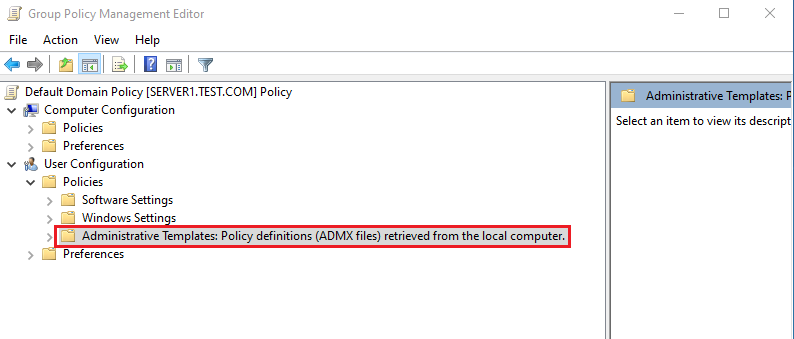
3. On the Group Policy Management Editor, double click User Configuration, expand Policies, and then click Administrative Templates, if you check on that, you will see a note saying Administrative Templates: Policy definitions (ADMX files) retrieved from the local computer.
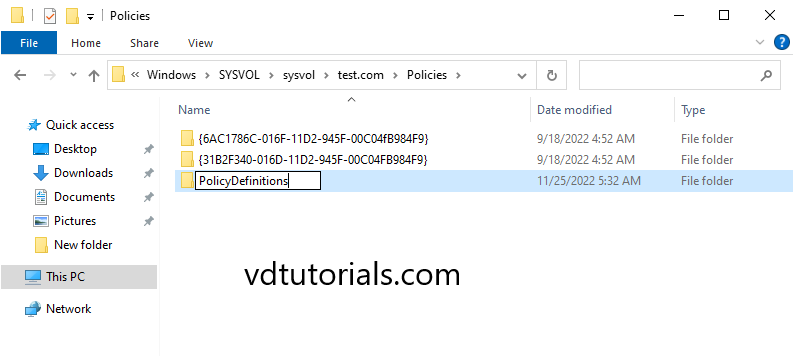
4. Access your Policies folder and create a new folder name PolicyDefinitions.
c:\windows\SYSVOL\sysvol\comsys.local
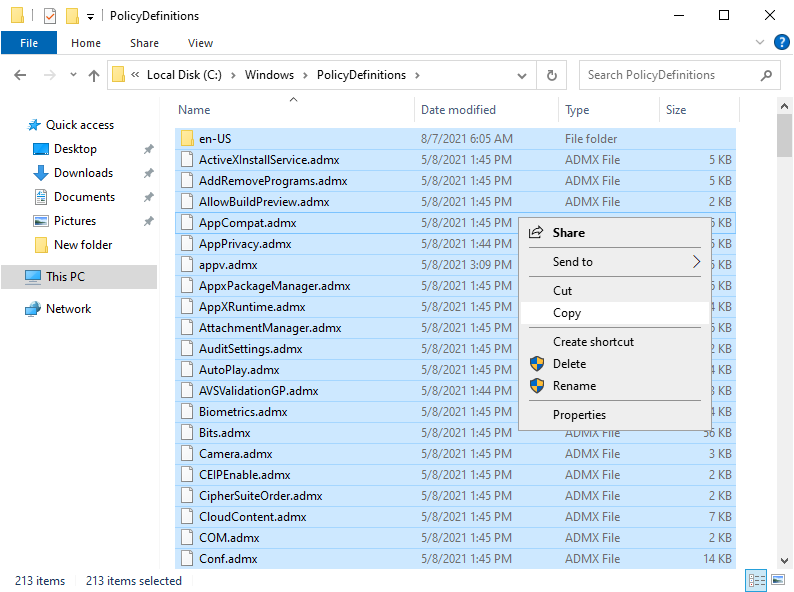
5. Access to your C:\windows\PolicyDefinitions folder, what you need to do here is to copy all .adml & .admx files.
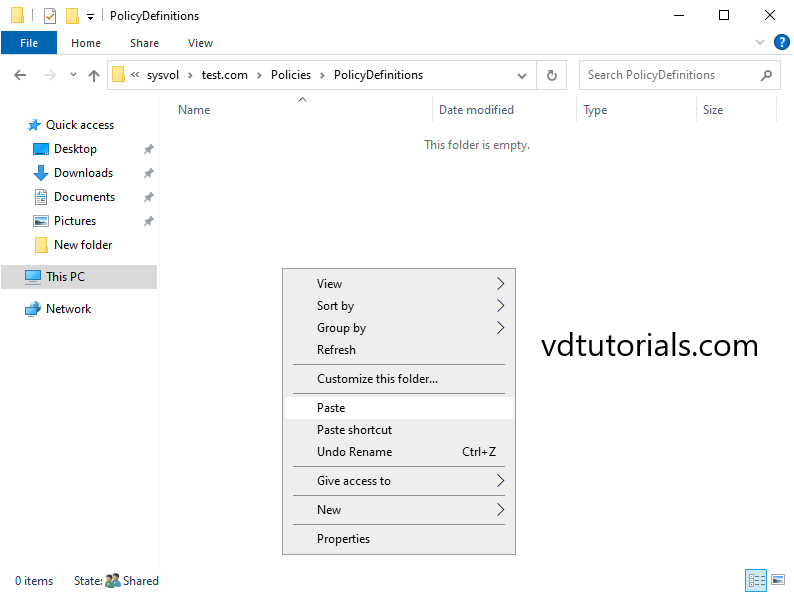
6. Then, paste the .adml & .admx files that you copied just now into c:\windows\SYSVOL\sysvol\comsys.local\PolicyDefinitions folder.
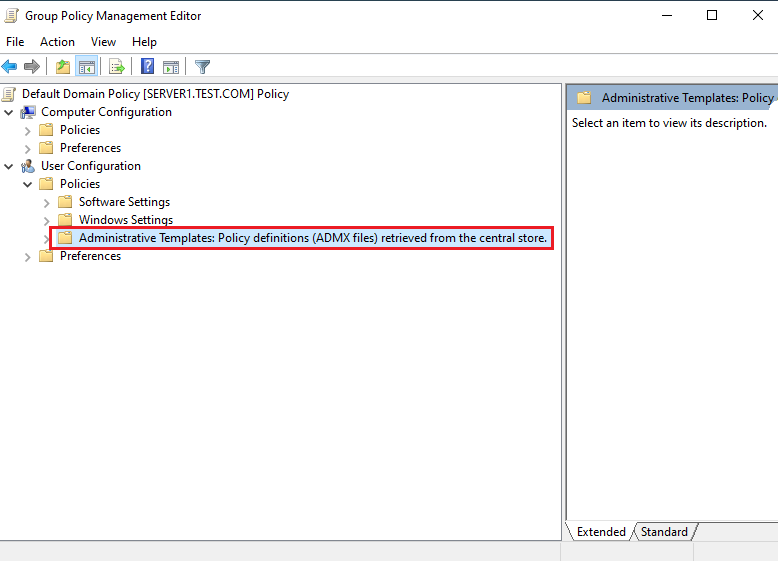
7. Open the Group Policy Management Editor interface, expand User Configuration> Polices, point your cursor to the Administrative Templates folder, and verify that it reads: Administrative Templates: Policy definitions (ADMX files) retrieved from the central store.
Create and configure Starter GPOs
Starter Group Policy Objects are templates for Group Policy settings. Starter Group Policy Objects enable an administrator to create and have a pre-configured group of settings that represent a baseline for any future policy to be created.
8. Open the Server Manager dashboard, click tools, and select Group Policy Management.
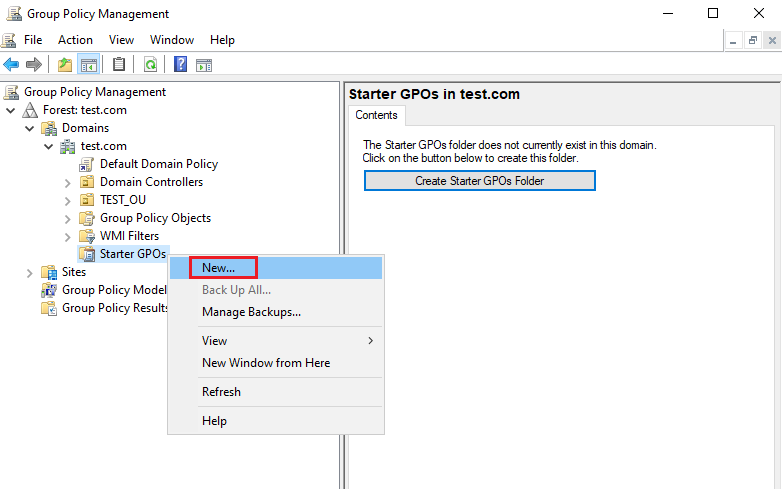
9. Create a new Starter GPO, right-click the Starter GPOs folder, and then click New.
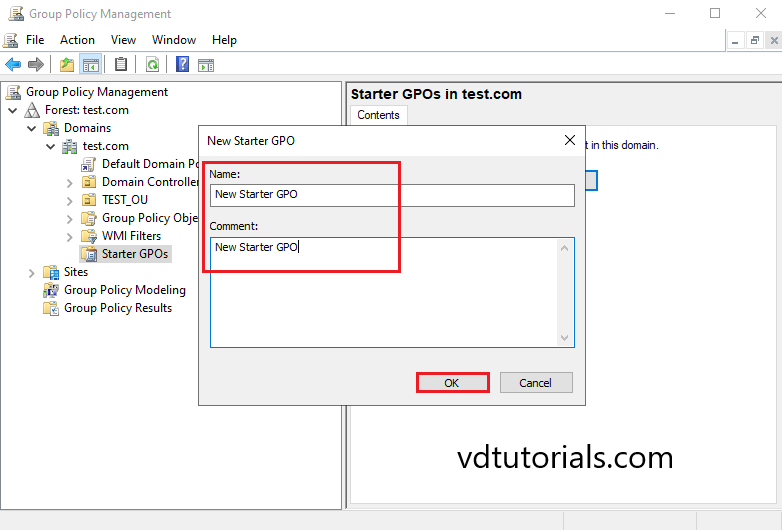
10. Enter Name and Comment for New Starter GPO and click OK.
- Name: New Starter GPO
- Comment: New Starter GPO
In this tutorial, we are going set wallpaper for windows clients via Group Policy in Windows Server 2022.
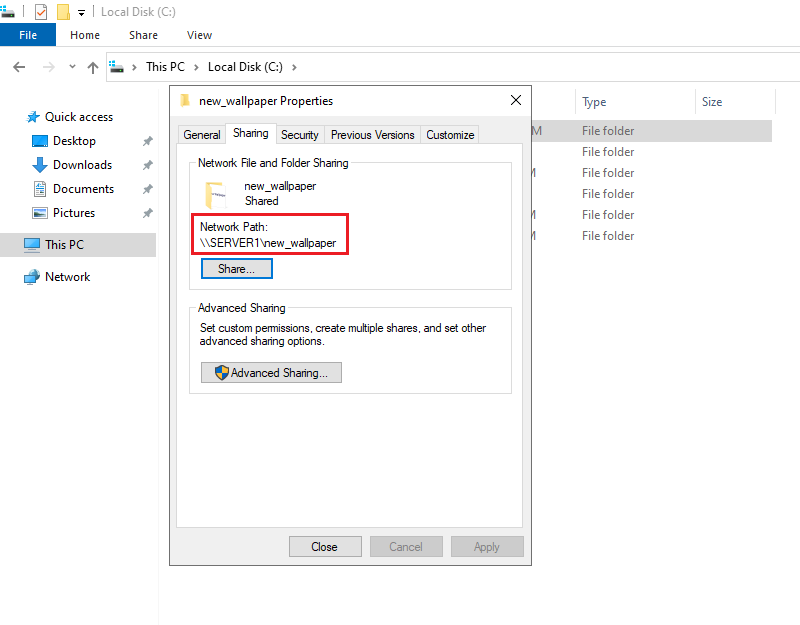
11. Share this folder with everyone’s read-only permission.
Folder path: \\SERVER1\new_wallpaper
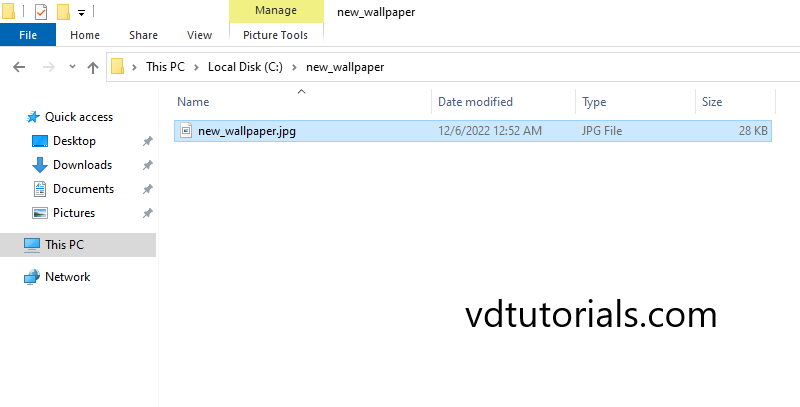
12. Copy the image which you want to set up as a desktop background to this shared folder.
Image Name: new_wallpaper.jpg
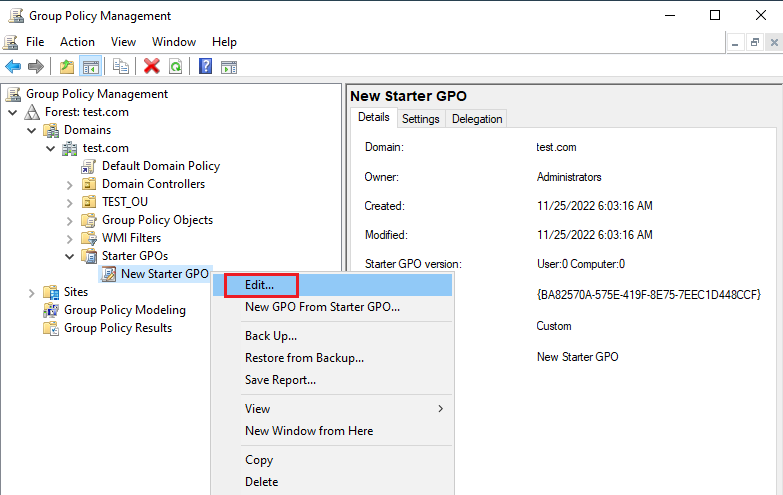
13. Right click on New Starter GPO and Click Edit.
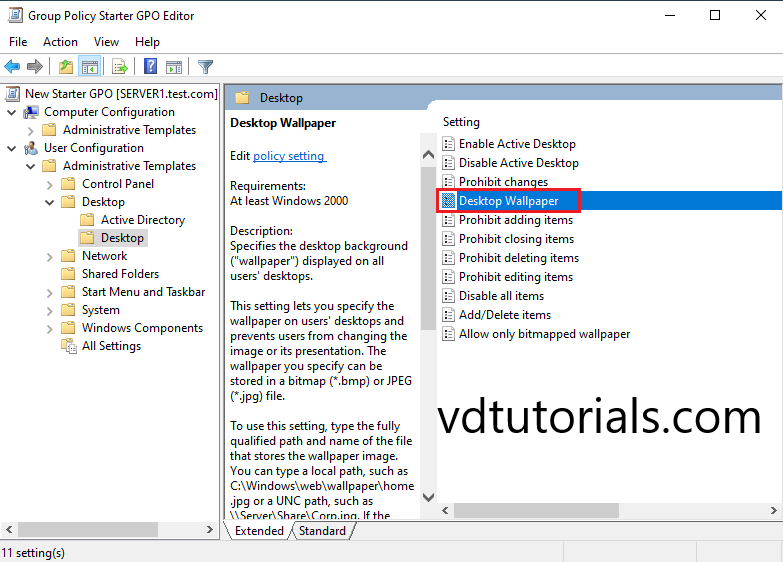
14. Open Group Policy Management Editor interface.
User Configuration > Administrative Templates > Desktop > Desktop Wallpaper
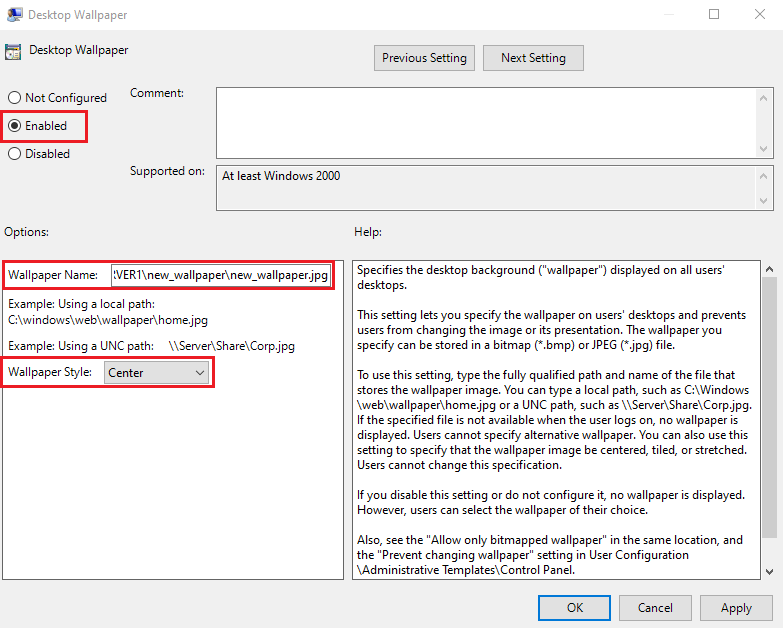
15. Under the Desktop wallpaper console, we have to give the fully qualified path and name of the file that stores the wallpaper image and configures the wallpaper style.
Wallpaper Name: \\SERVER1\new_wallpaper\new_wallpaper.jpg
Create a GPO and Link
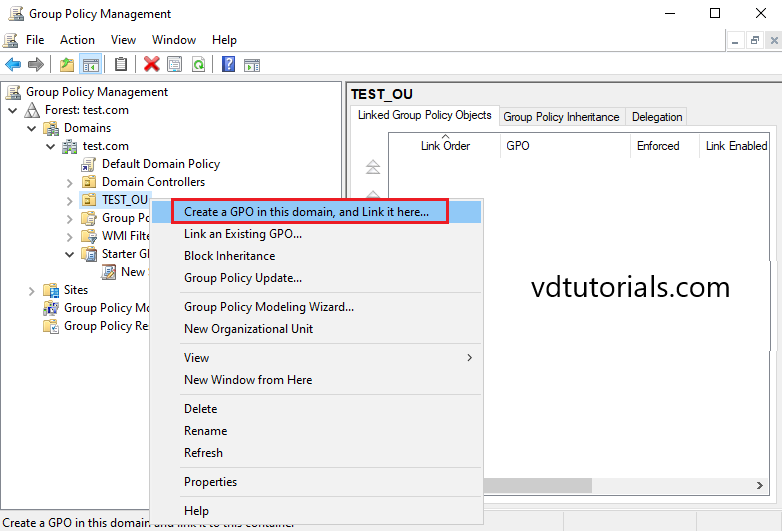
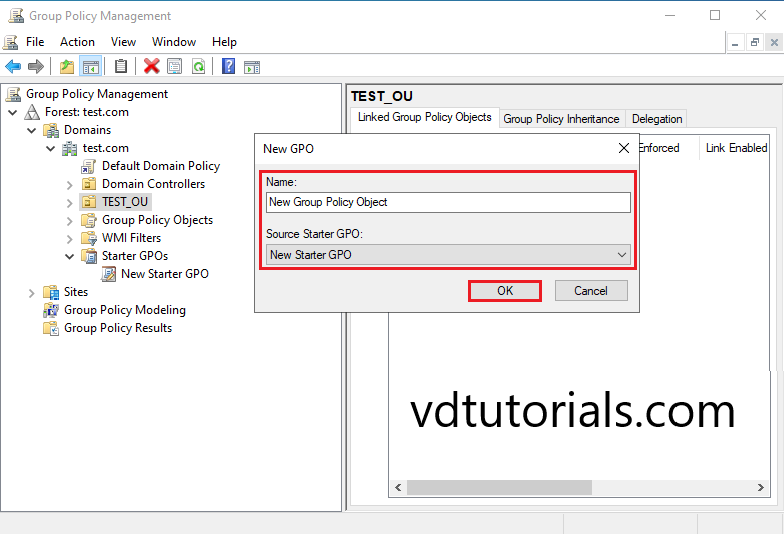
16. Open Group Policy Management, Right click on OU and select Create a GPO in this domain and Link it here.
17. Enter Name, select Source Starter GPO, and click OK.
- Name: New Group Policy Object
- Source Starter GPO: New Starter GPO
Check the result on a client machine
- Client Demo environment
- Computer Name: server2.test.com
- Operating System: Windows Server 2022 Datacenter
- IP Address: 192.168.0.4
- Domain: test.com
- Organizational unit: TEST_OU
- A user within Organizational unit (TEST_OU): test\user1
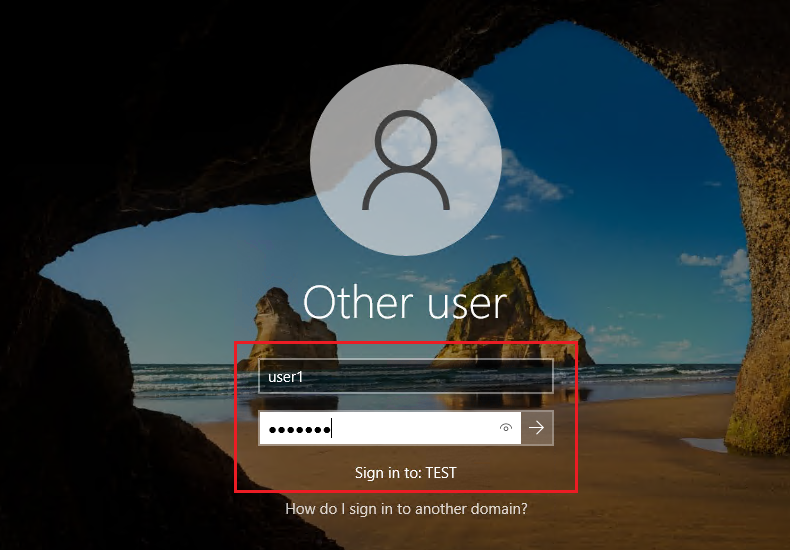
18. Enter User Name and Password.
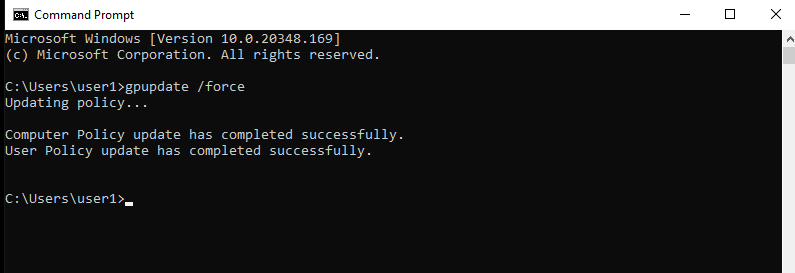
19. On the client, the machine waits for the policy to get updated automatically or manually updates the group policy settings by running the command gpupdate /force in the command prompt.
20. Check and verify the wallpaper.

