This step by step tutorial covers how to configure the Shared folder and access shared folders on Windows Server 2022. The File Server role manages shared folders and enables users to access files on this computer from the network.
Table of Contents
- Create a Shared Folder on Windows Server 2022
- Access Shared Folders on Windows 11
Server demo environment
- Computer Name: server1.test.com
- Operating System: Windows Server 2022 Datacenter
- IP Address: 192.168.0.3
Create a Shared Folder on Windows Server 2022
In this tutorial, we are going to share one folder (E:\share).
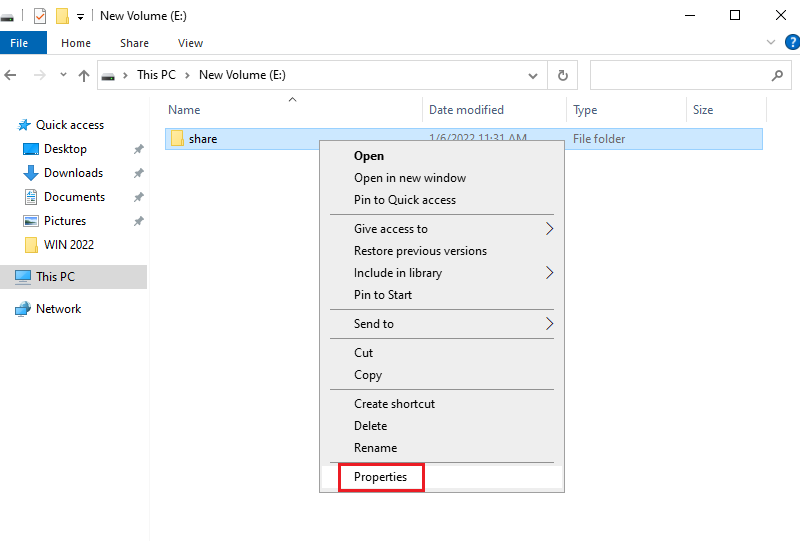
1. Right Click the Folder and Properties.
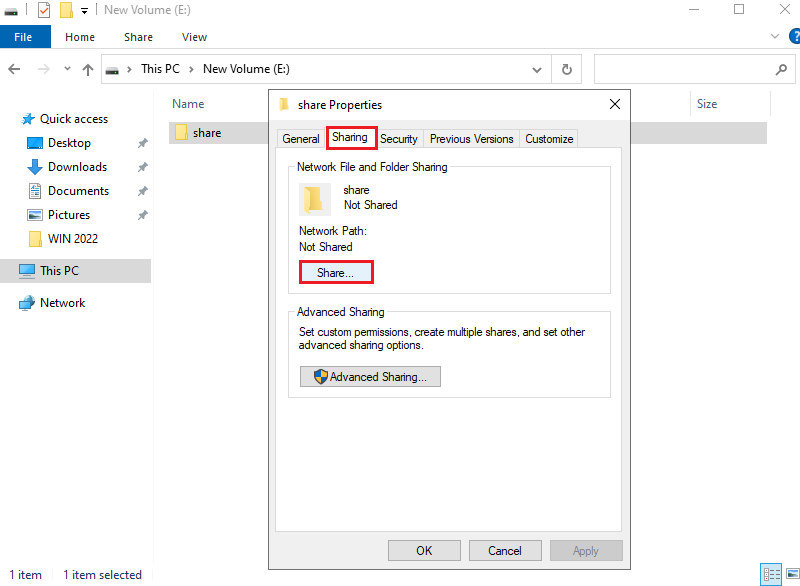
2. Select Sharing and click Share.
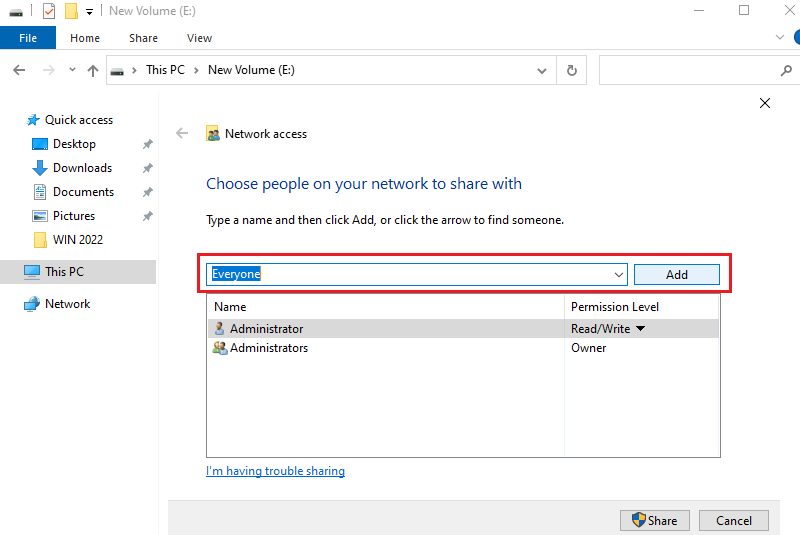
3. Choose people on your network to share with the folder, in this tutorial we choose Everyone (All users). If you need to share a specific user select Find people and select the user.
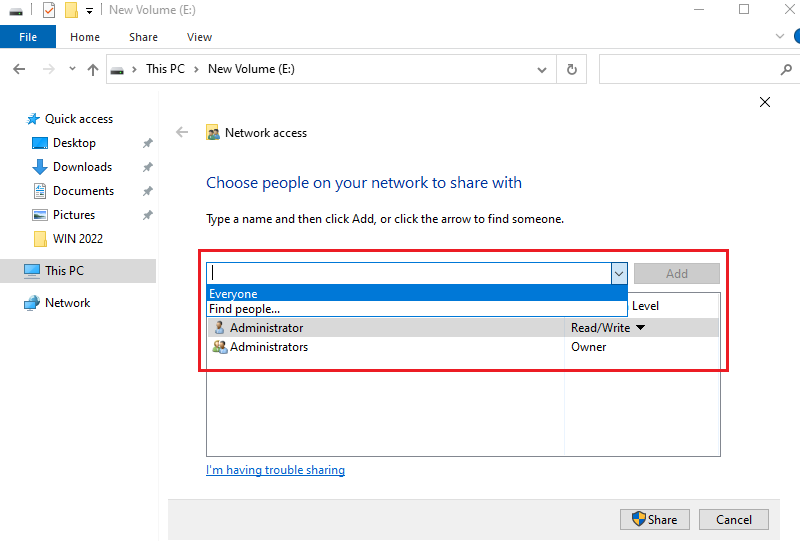
4. Add Everyone.
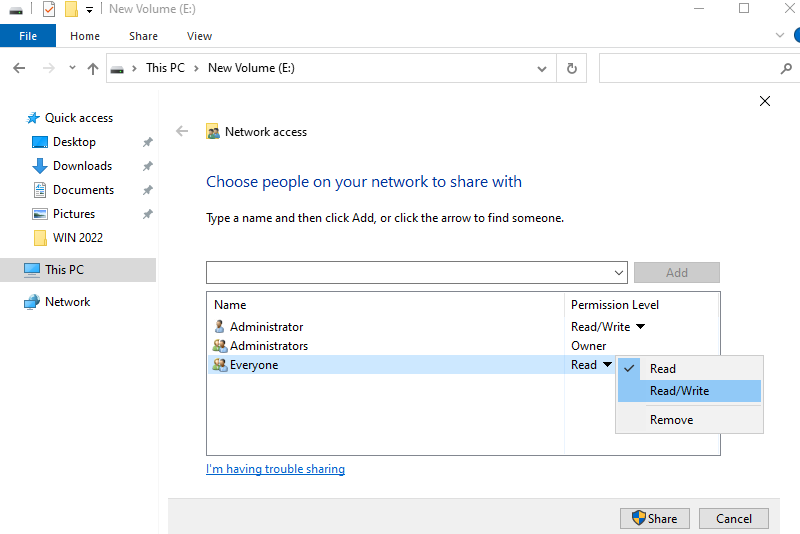
5. Set Permission Read/Write for Everyone.
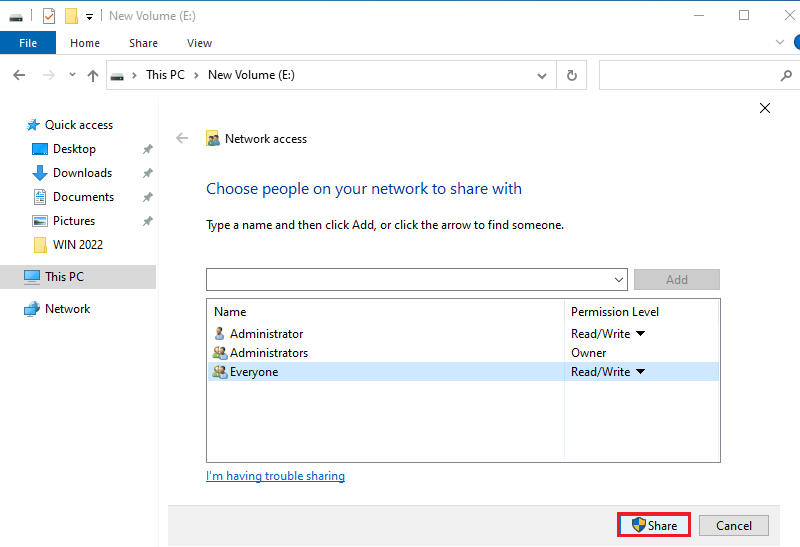
6. Verify user and Permission Level details and click Share.
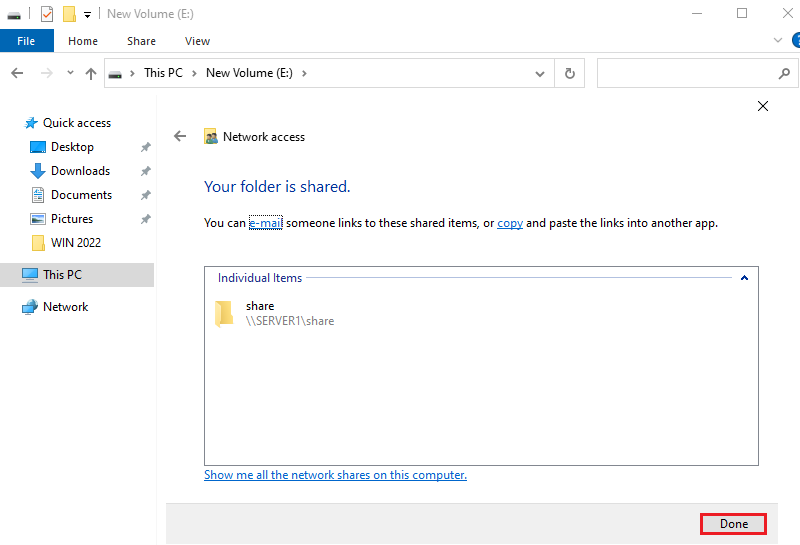
7. Click Done.
Access Shared Folders on Windows 11
Make sure the client and the server are on the same network. In this tutorial server and clients are on the same network and same domain.
Demo environment – Client
- Computer Name: pc1.test.com
- Operating System: Windows 11 Pro
- IP Address: 192.168.0.11
There are a couple of ways to connect to a folder that has been shared over the network. In this tutorial, access shared folders using the network path.
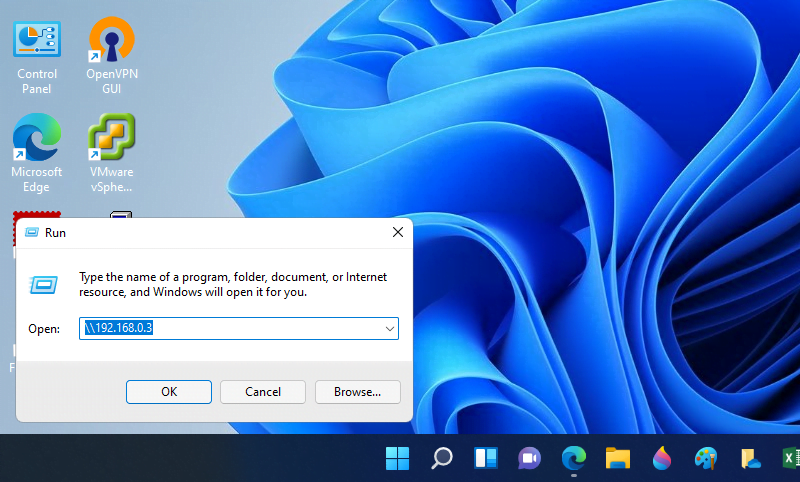
1. Open RUN, input Share path and click OK.
- Share path: \\192.168.0.3
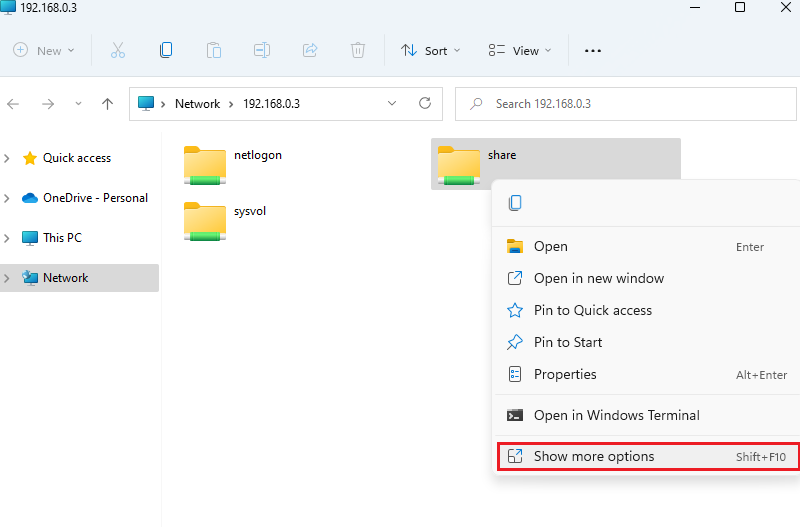
2. Right click on the Shared folder and click Show more options.
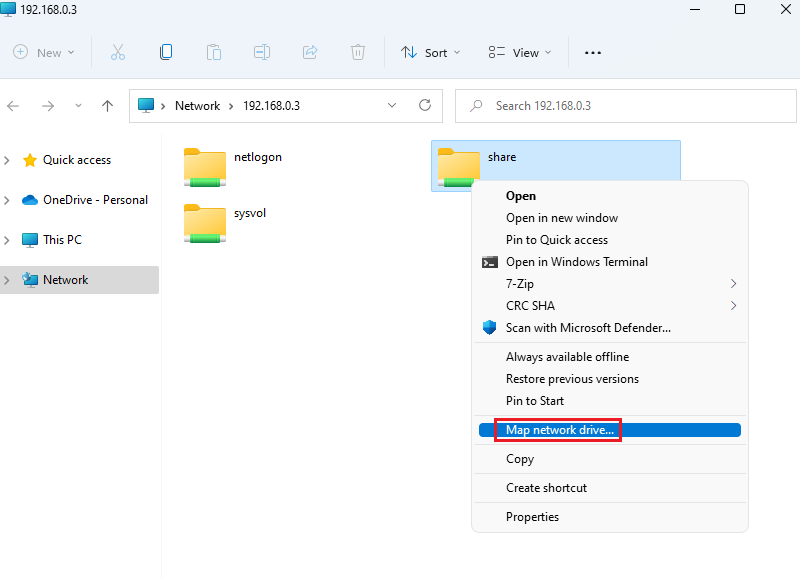
3. Click Map network drive.
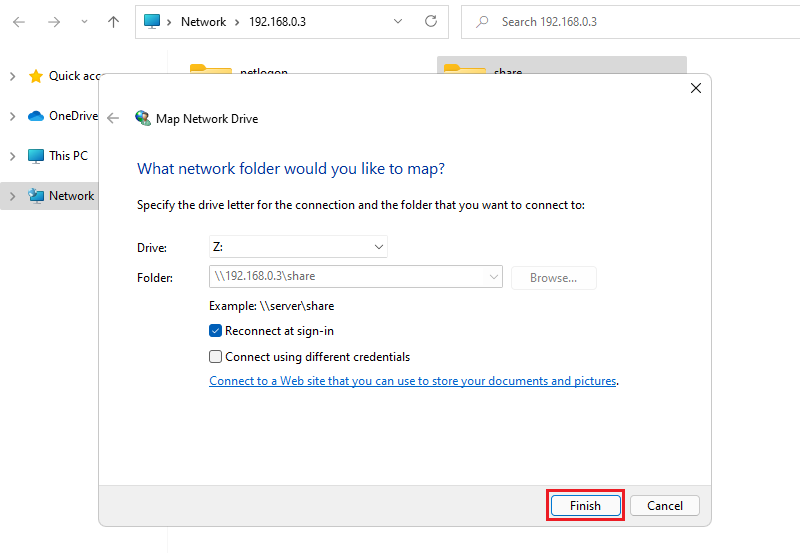
4. Select an available drive letter, enable Reconnect at sign-in, and click Finish.
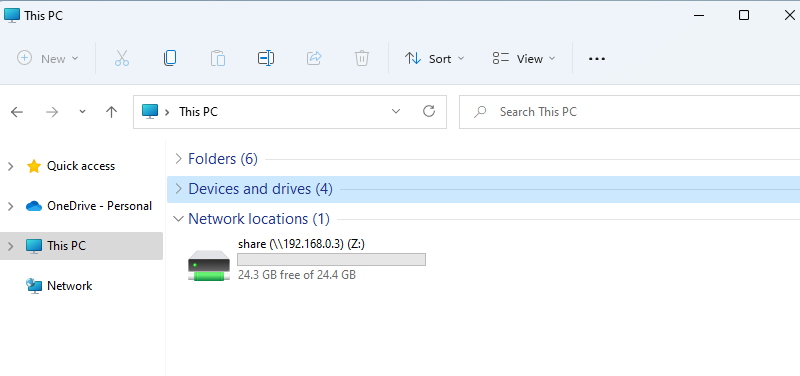
If you want the shared folder to be visible every time you open This PC, even if you log off and then log back in, enable Reconnect at sign-in.
5. Check the network folder.
