Windows Server Backup is a feature that provides a backup of your operating system, applications, and data. Recovers this backup in case of disasters like hard disk failures. This step by step tutorial covers how to schedule windows server backup to a remote shared folder on Windows Server 2022.
Prerequisite Required
- Install Windows Server Backup
Demo environment
- Computer Name: server1.test.com
- Operating System: Windows Server 2022 Datacenter
- IP Address: 192.168.3.3
- File Server location: \\192.168.3.4\File Server
Schedule Windows Server Backup to a remote shared folder
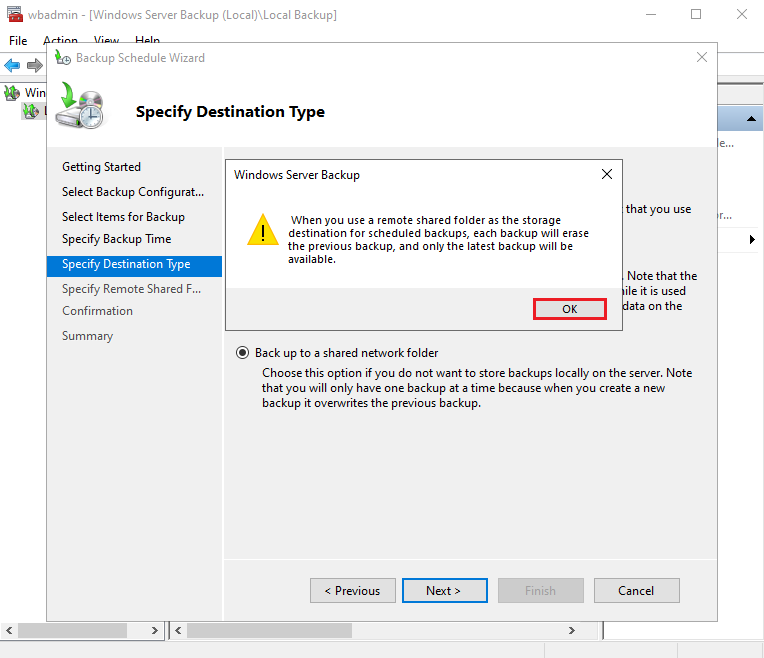
When you use a remote shared folder as the storage destination for scheduled backups, each backup will erase the previous backup, and only the latest backup will be available.
Steps for Schedule Windows Server Backup
- Open Backup Schedule Wizard
- Getting Started
- Select Backup Configuration
- Select Items for Backup
- Specify Backup Time
- Specify Destination Type
- Specify Remote Shared Folder
- Confirmation
- Summary
1. Open Backup Schedule Wizard
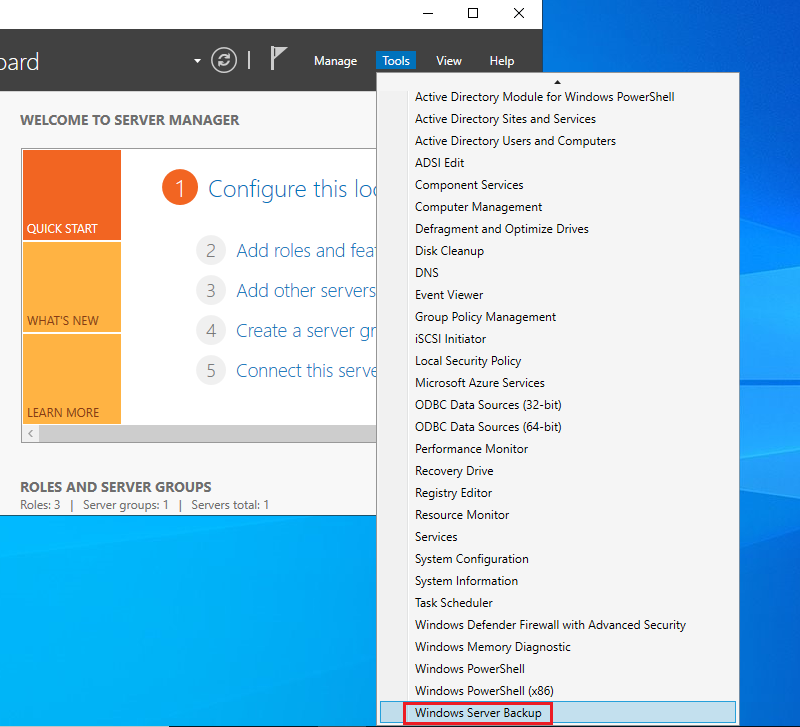
Open the Server Manager dashboard, click Tools, and select Windows Server Backup.
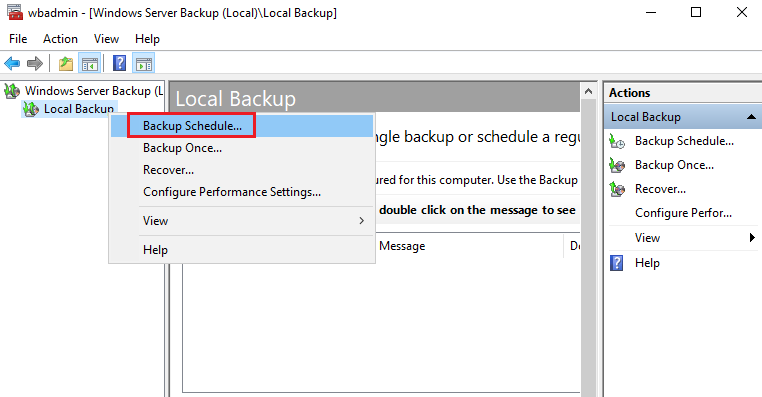
2. Select Local Backup and Click Backup Schedule.
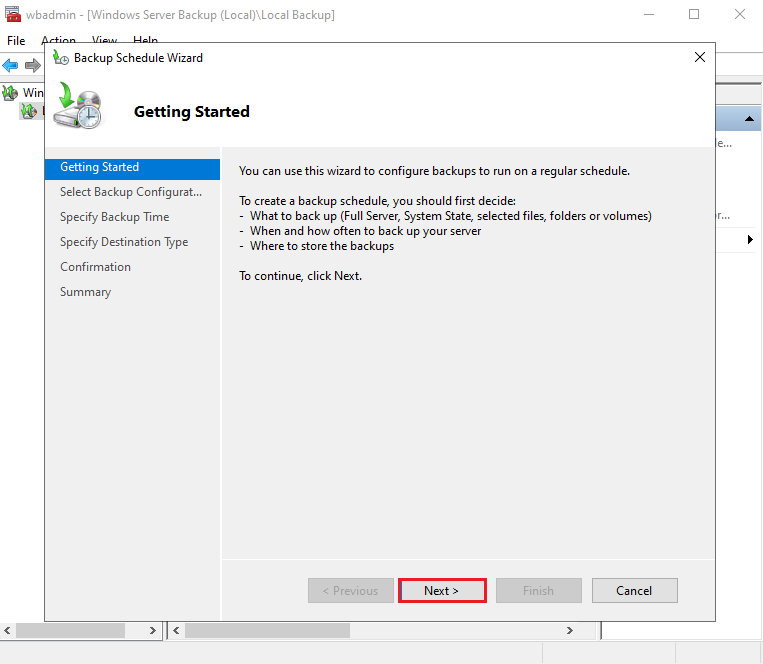
2. Getting Started
Click Next to continue.
3. Select Backup Configuration
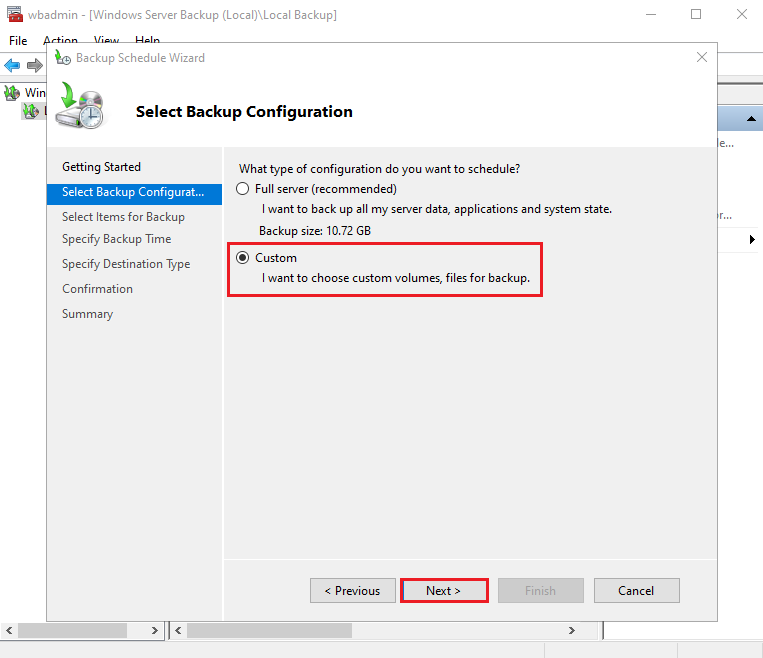
Select Custom and click Next. In this Tutorial, we schedule the backup of a specific folder (E:\DATA). If you need full server backup Choose Full server (recommended).
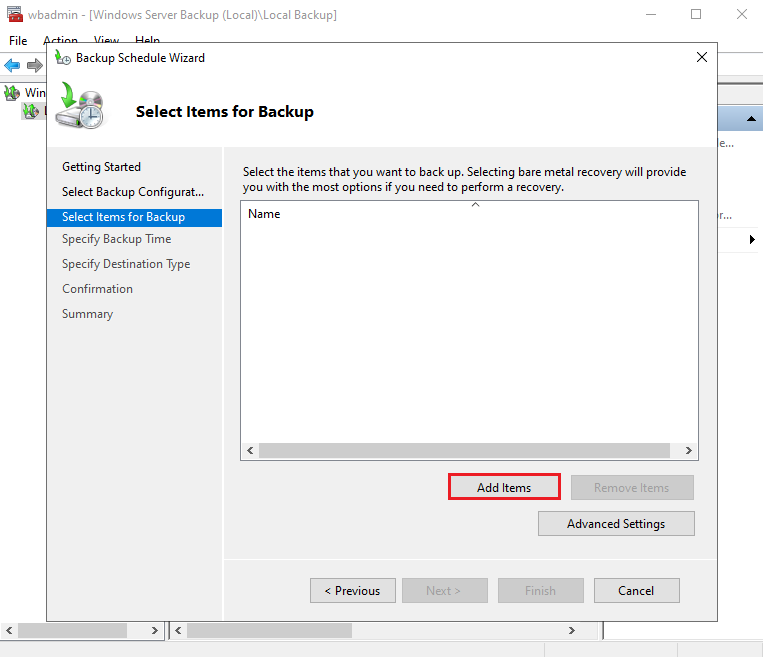
4. Select Items for Backup
Click Add Items.
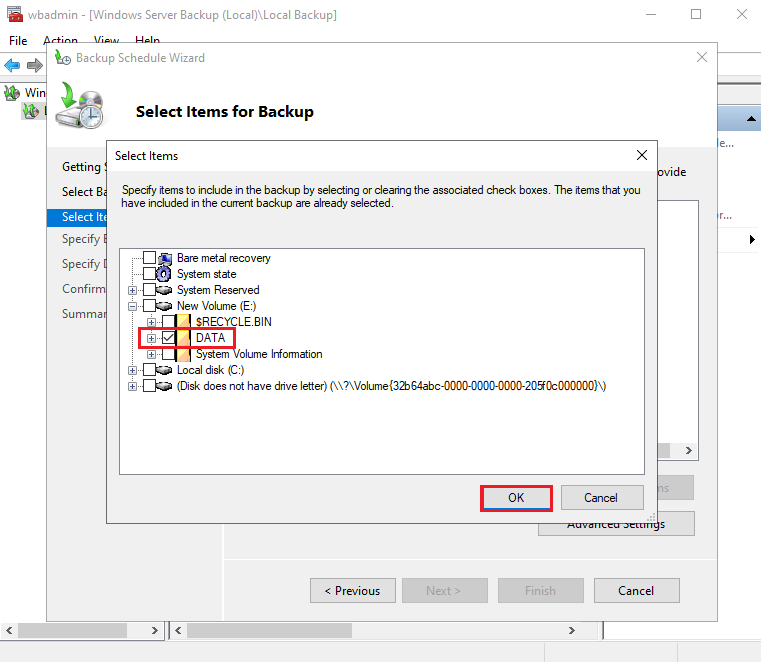
Select the volume(s) to be backed up, and then click OK, In this Tutorial, we schedule the backup of a specific folder (Folder location is E:\DATA).
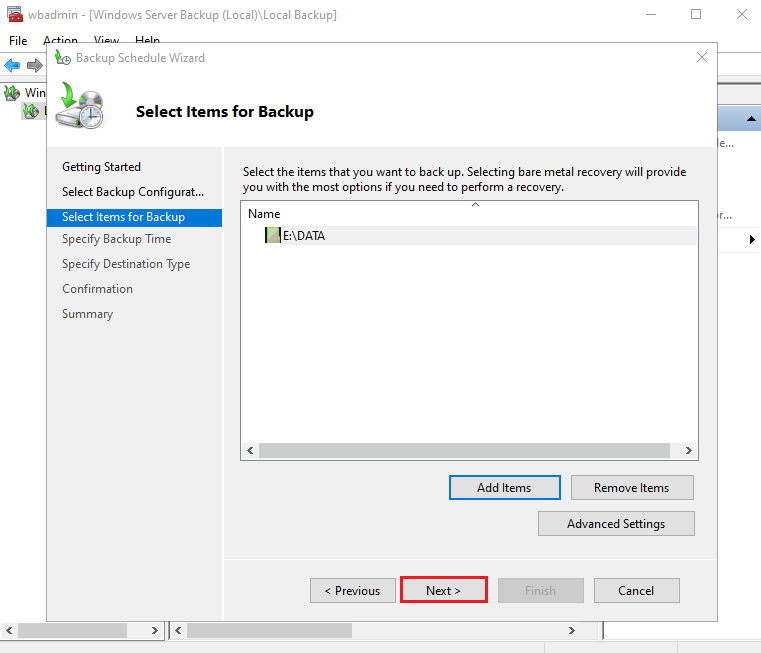
Click Next to continue. If you need to backup other items click add items.
5. Specify Backup Time
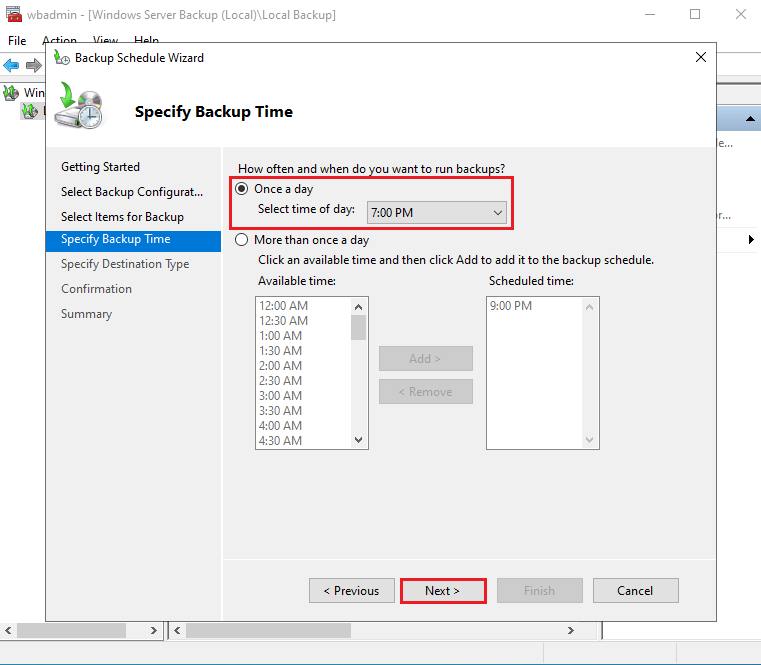
Configure backup time and Click Next. In this tutorial, we set once a day and set time at 7 PM.
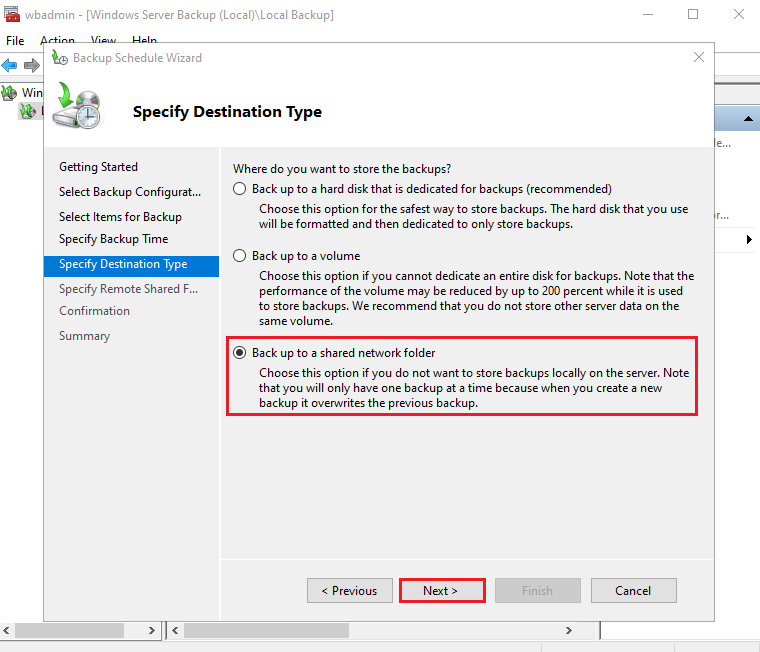
6. Specify Destination Type
Select Back up to the shared network folder and click Next.
Click OK to continue.
7. Specify Remote Shared Folder
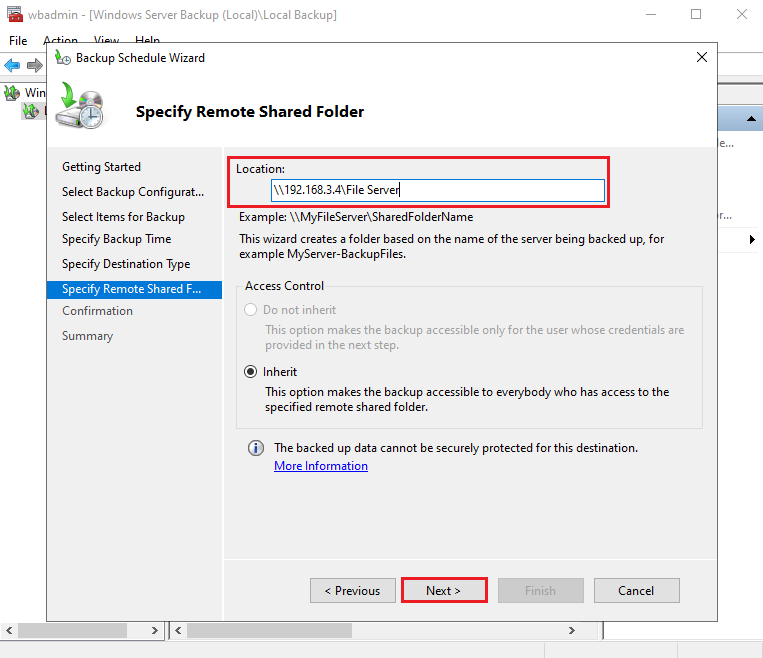
Enter the shared network folder location and click Next.
- Location: \\192.168.3.4\File Server
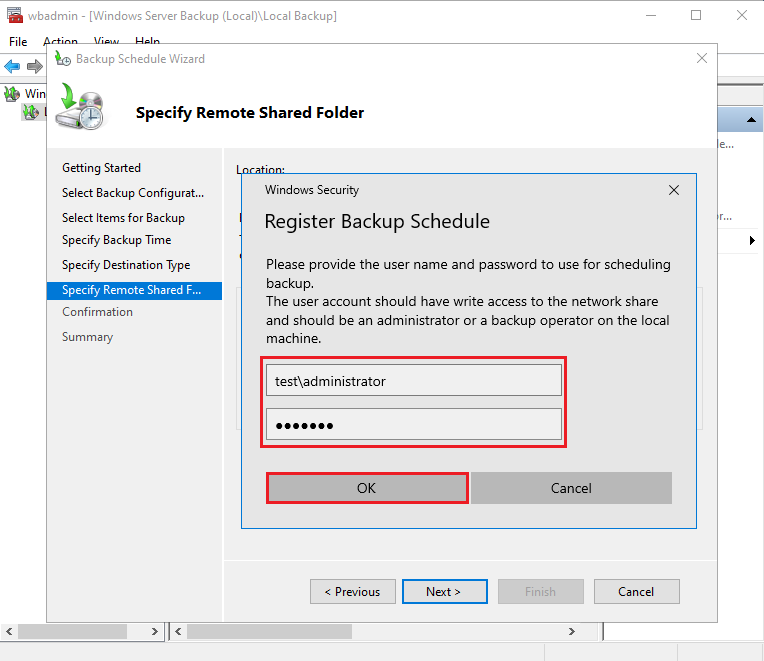
Please enter the user name and password to use for scheduling backup. The user account should have Read and Write access to the network share.
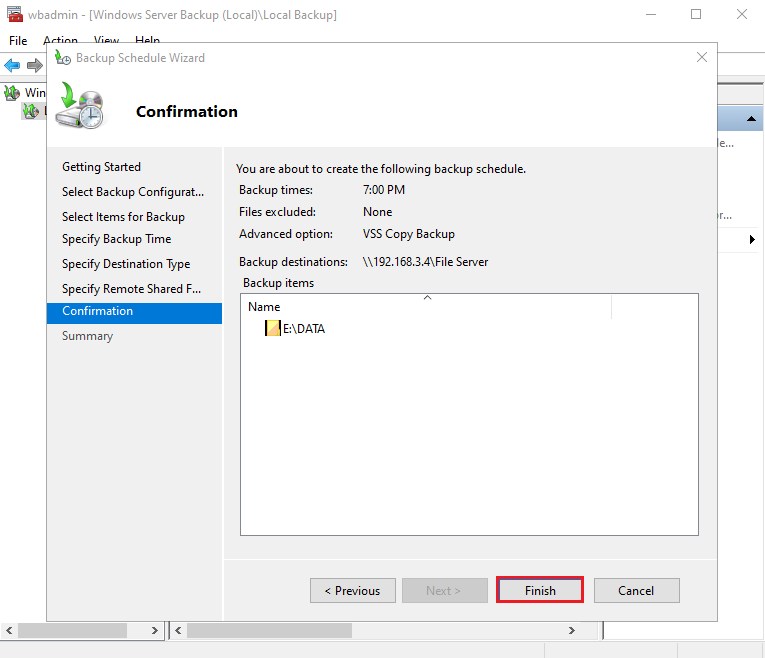
8. Confirmation
Verify the Configuration and click Finish.
9. Summary
Click Close.
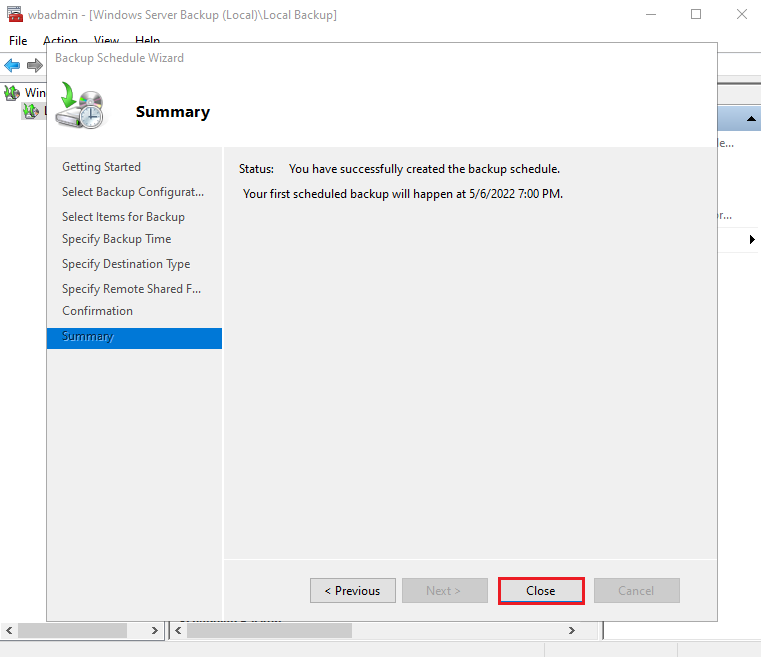
Schedule Windows Server Backup to a remote shared folder has been configured.
