IP address and domain name restrictions in Internet Information Services allow you to deny access to the web server, websites, folders, or files. Rules can be configured for remote IP addresses or based on the Domain name.
Internet Information Services (IIS) is a web server created by Microsoft, IIS web server accepts requests from remote client computers and returns the appropriate response. This step by step tutorial covers how to Configure IP Addresses and Domain Restrictions in IIS Web Server.
Table of Contents
- Configure IP Address Restriction
- Configure Domain Restriction
Prerequisite Required
- Install Internet Information Services(IIS)
Demo environment
- Computer Name: server1.test.com
- Operating System: Windows Server 2022 Datacenter
- IP Address: 192.168.0.2
Configure IP Address Restriction
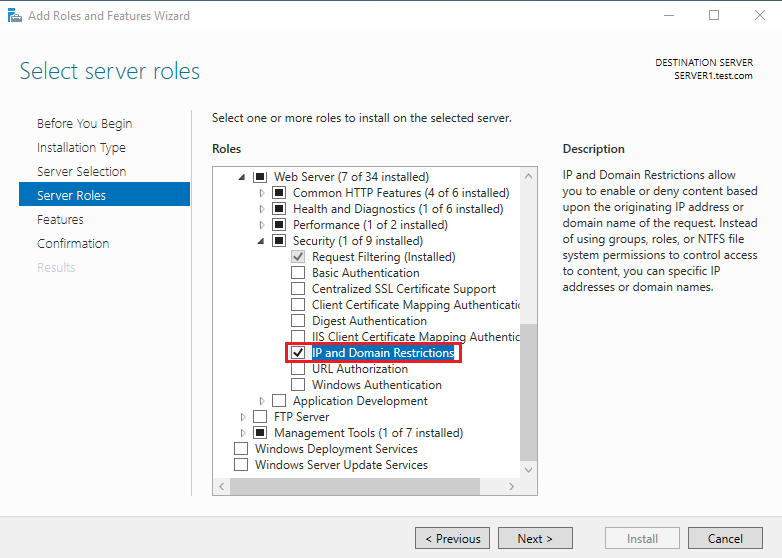
1. Install IP and Domain Restrictions Service.
IP and Domain Restrictions option is not enabled by default when you install Internet Information Services. We can enable IP and Domain Restrictions option by adding the above Role Service as shown below.
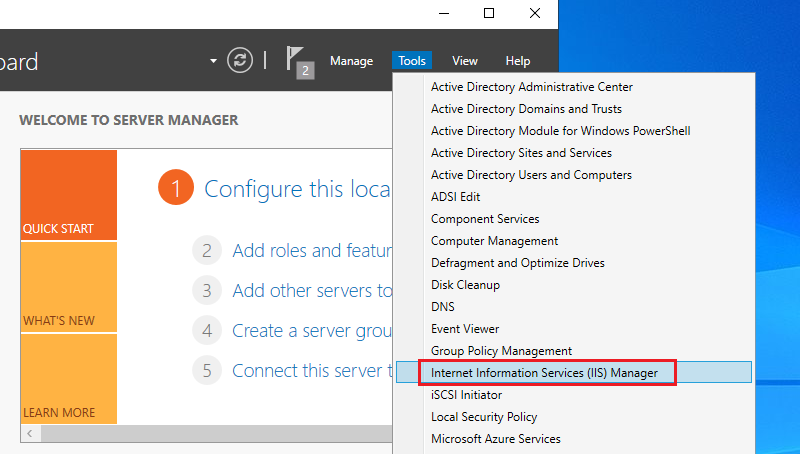
2. Open the Server Manager dashboard, click Tools, and select Internet Information Services (IIS) Manager.
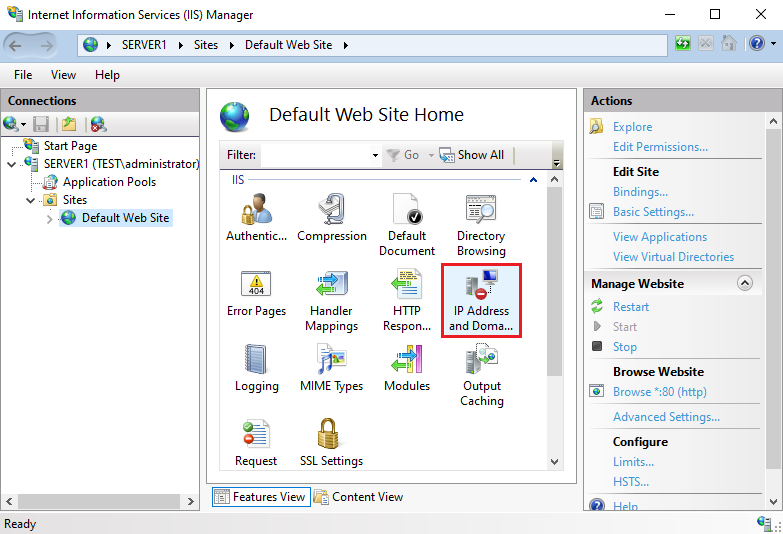
3. Select the website and open IP Address and Domain Restrictions.
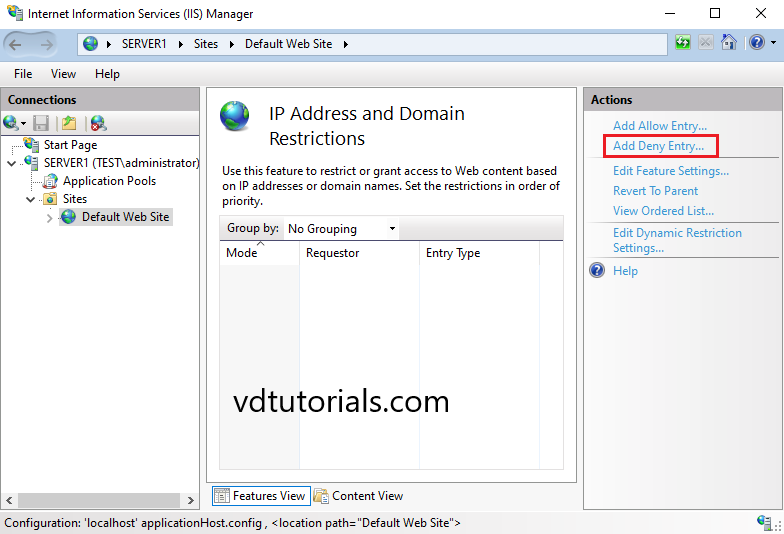
4. By default setting is Allow all, click Add Deny Entry.
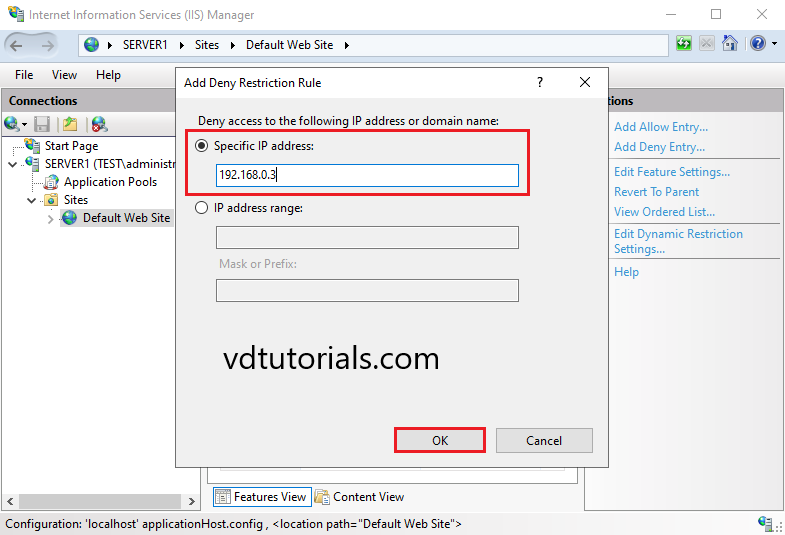
5. Input an IP address on a Specific IP address field or IP address range on the IP address range.
In this tutorial, we choose a Specific IP address (192.168.0.3).
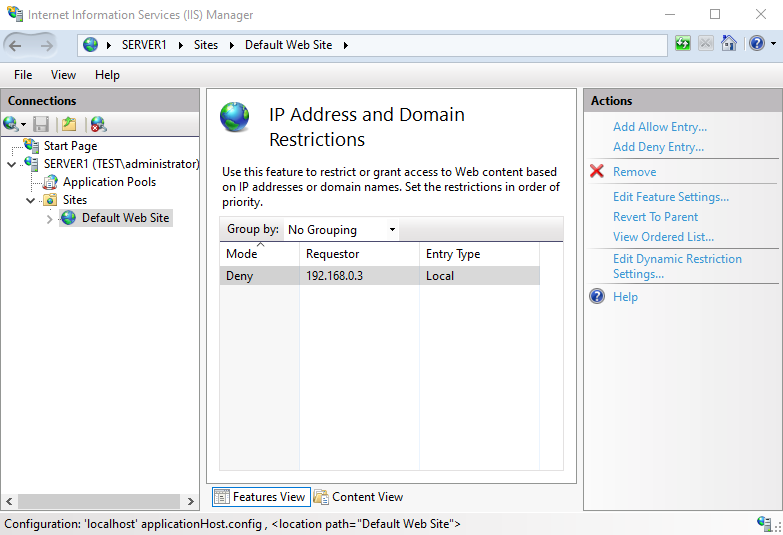
6. Restriction Rule has been added.
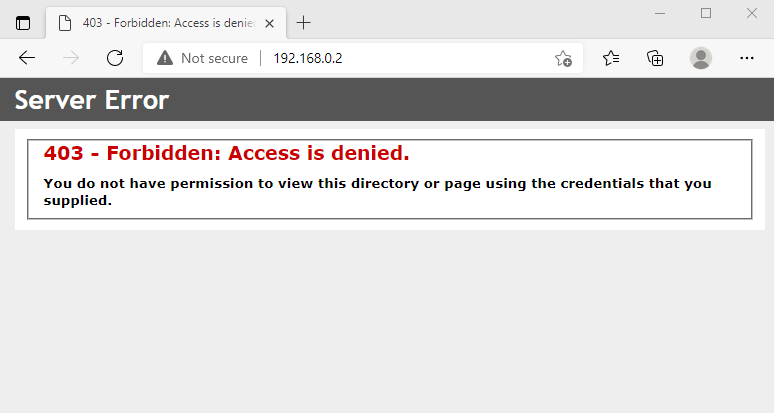
7. Verify the Restriction.
Configure Domain Restriction
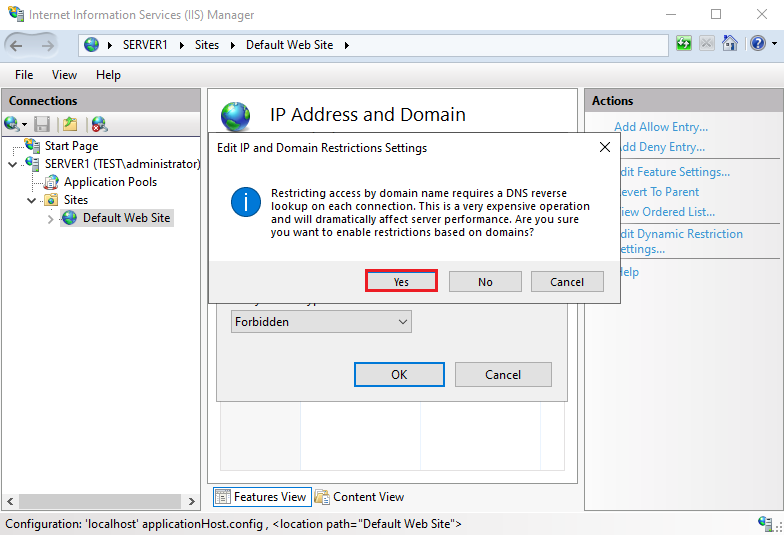
Configure Domain Restriction is not recommended, Restricting access by domain name requires a DNS reverse lookup on each connection. This is a very expensive operation and will dramatically affect server performance.
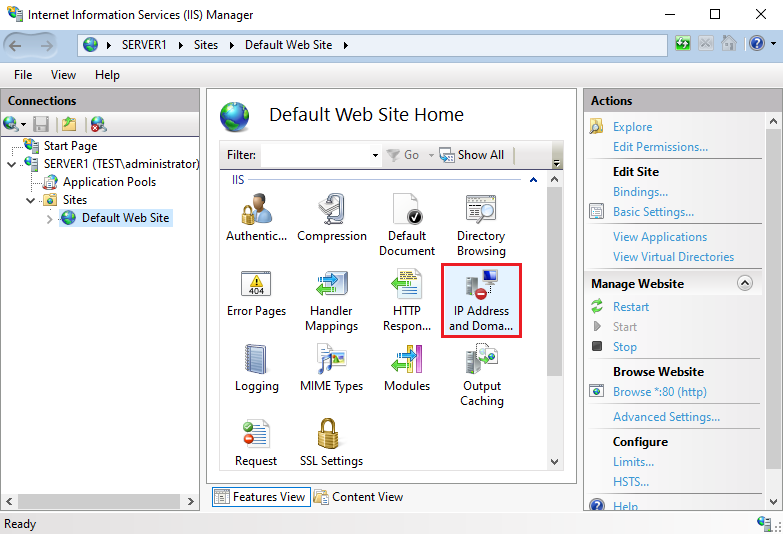
8. Open Information Services (IIS) Manager, select the website, and open IP Address and Domain Restrictions.
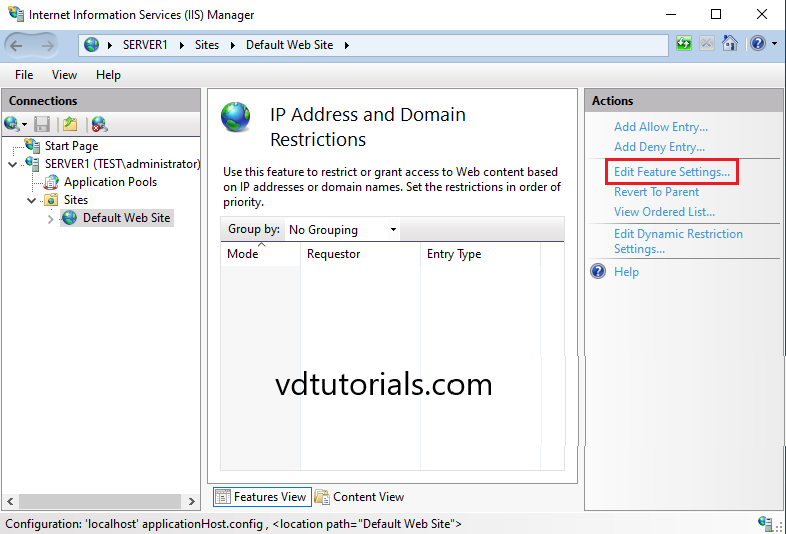
9. Click Edit Feature Settings.
10. Configure Domain Restriction Settings.
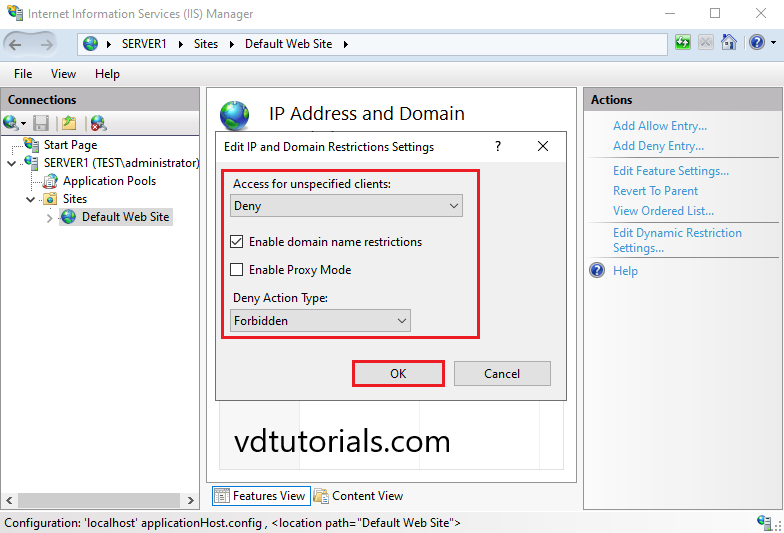
11. In Edit and Domain Restriction Settings, Click Yes.
