Internet Small Computer Systems Interface is an Internet Protocol-based storage networking standard for linking data storage facilities. It provides block-level access to storage devices by carrying SCSI commands over a TCP/IP network. iSCSI follows the Server-Client model. The iSCSI Target (Server) makes storage available for iSCSI Initiator (Clients) to use.
Table of Contents
- Install iSCSI Target
- Configure iSCSI Target
- Configure iSCSI initiator
Demo environment – iSCSI Target
- Computer Name: server1.test.com
- Operating System: Windows Server 2022 Datacenter
- IP Address: 192.168.3.3
Demo environment – iSCSI Initiator
- Computer Name: server2.test.com
- Operating System: Windows Server 2022 Datacenter
- IP Address: 192.168.3.4
Install iSCSI Target
Steps for Install iSCSI Target
- Open Add roles and features Wizard
- Select installation type
- Select destination server
- Select server roles
- Select features
- Confirm installation selections
1. Open Add roles and features Wizard
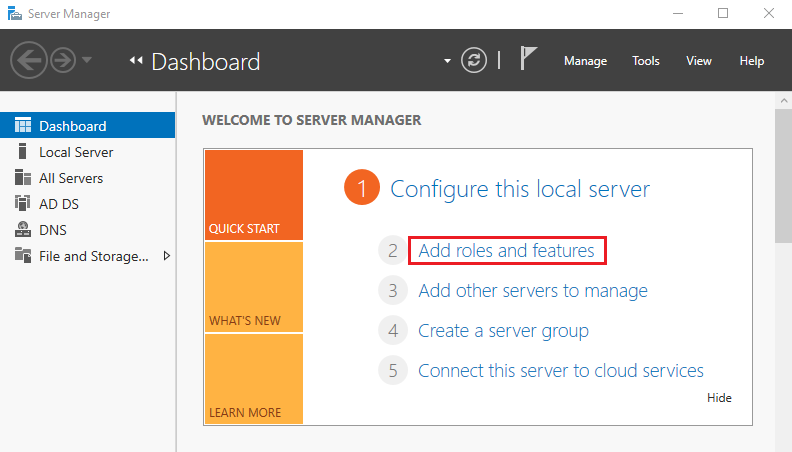
Open the Server Manager dashboard and click Add roles and features.
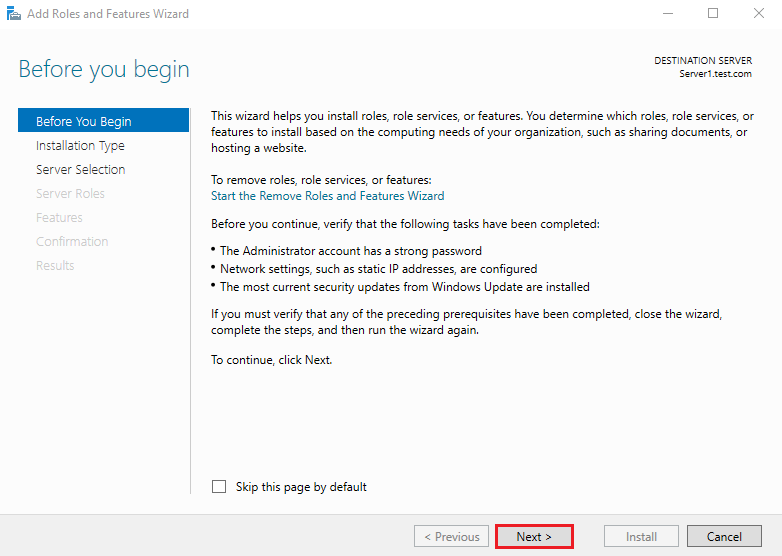
Before you begin, click Next.
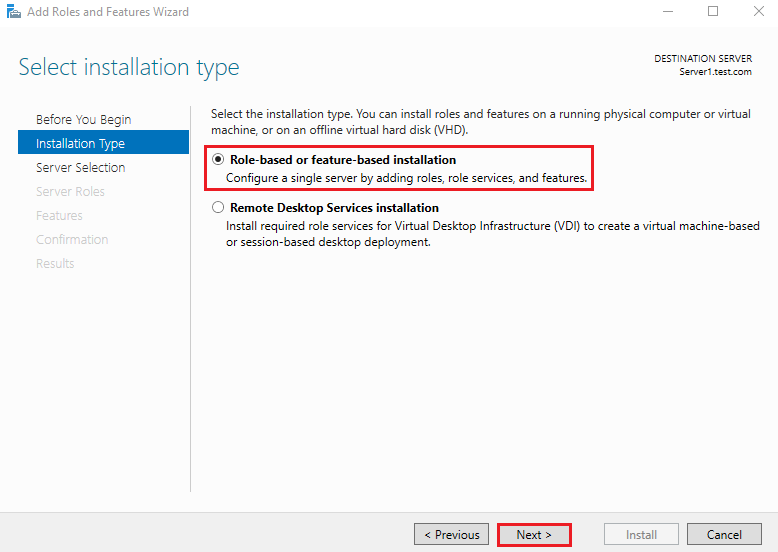
2. Select installation type
Select Role-based or feature-based installation and click on Next.
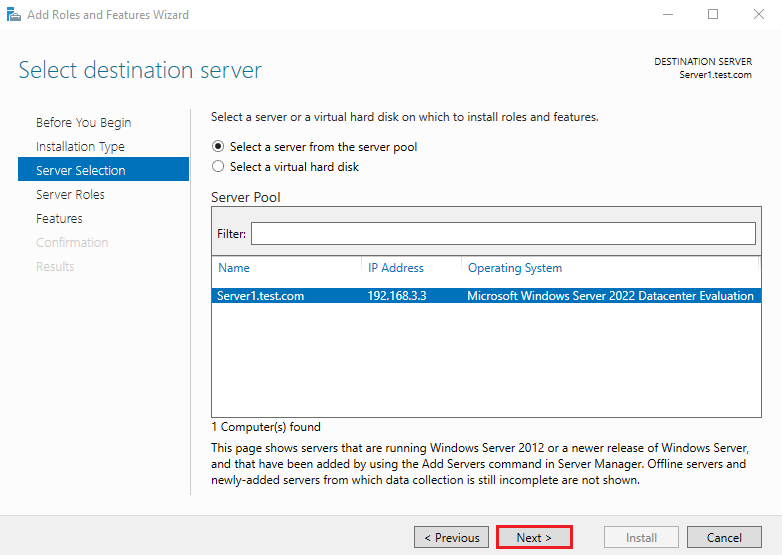
3. Select destination server
Select a Host to which you’d like to add services and click Next.
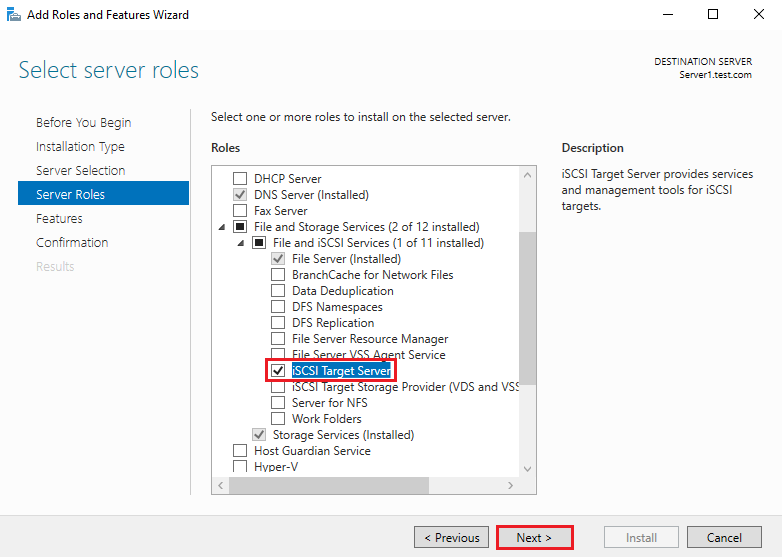
4. Select server roles
Choose the iSCSI Target Server box from the server roles page.
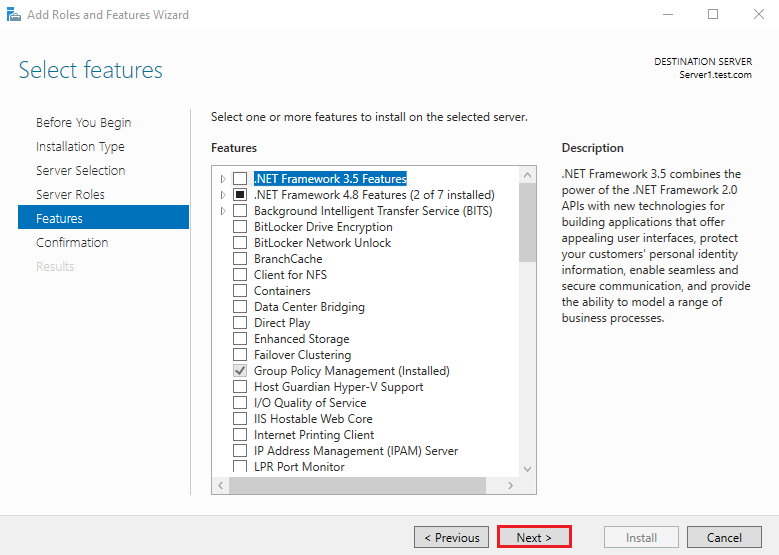
5. Select features
On the Select features console, just click Next because we do not require any extra features at the moment.
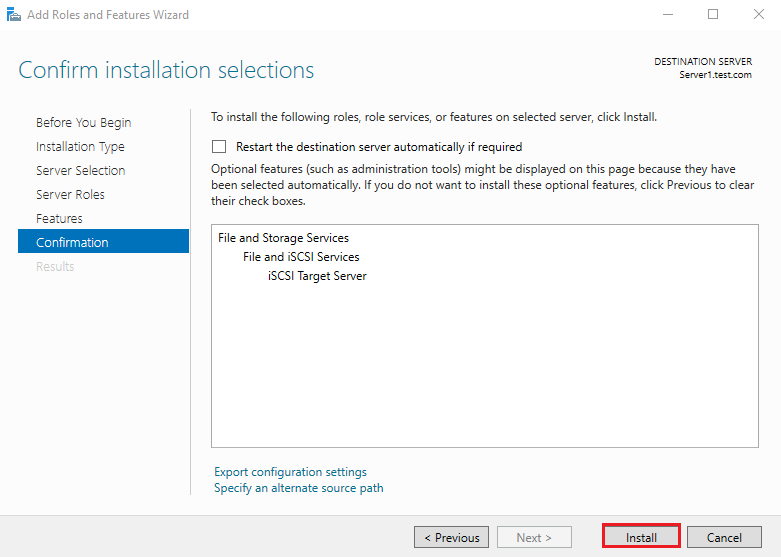
6. Confirm installation selections
Confirm installation selections and click on Install to start the installation process.
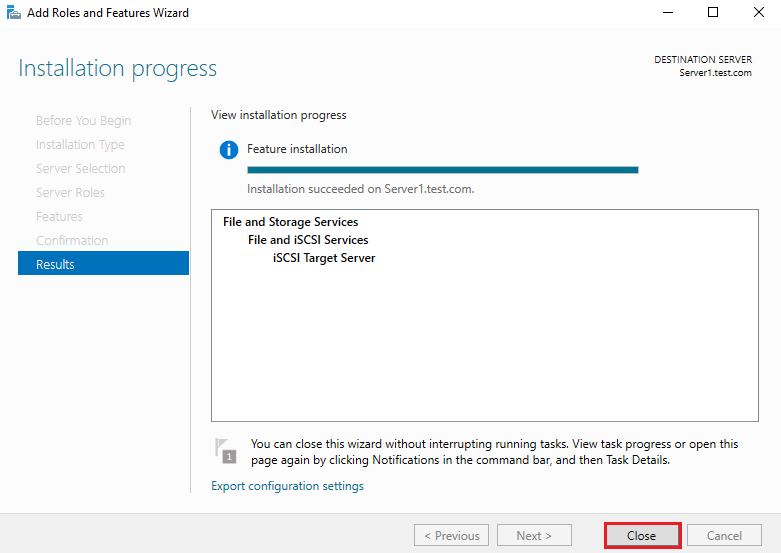
After finishing the installation, click Close.
Configure iSCSI Target
Steps for Configure iSCSI Target
- Open New iSCSI Virtual Disk Wizard
- Select iSCSI virtual disk location
- Specify iSCSI virtual disk name
- Specify iSCSI virtual disk size
- Assign iSCSI target
- Specify target name
- Specify access servers
- Enable Authentication
- Confirm selections
- View Results
1. Open New iSCSI Virtual Disk Wizard
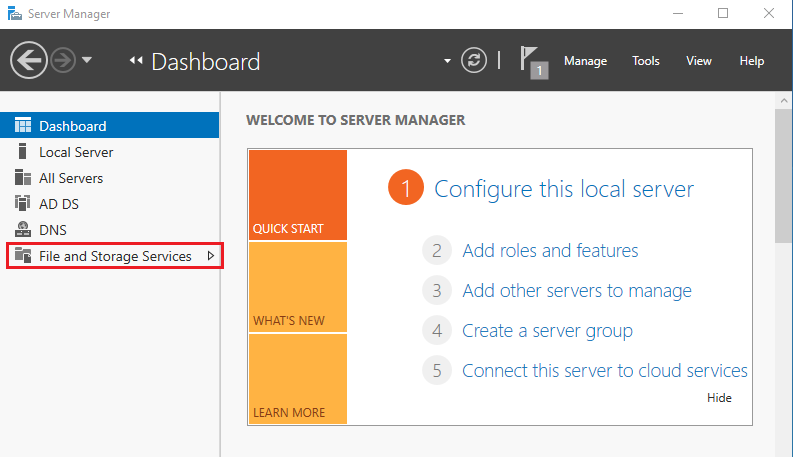
Open the Server Manager dashboard and click File and Storage Services.
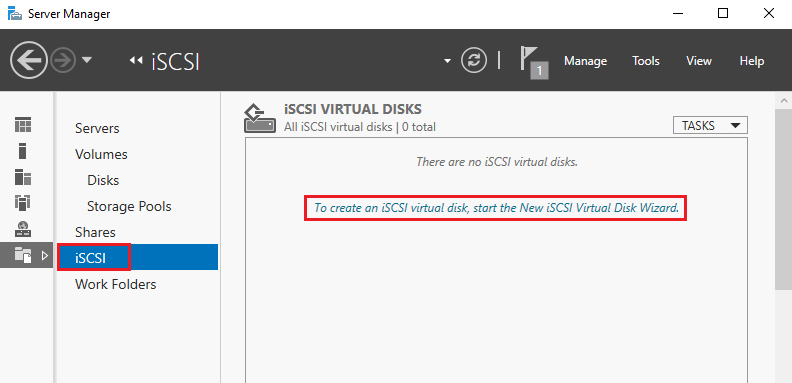
Select iSCSI and click To create an iSCSI virtual disk, start the New iSCSI Virtual Disk Wizard.
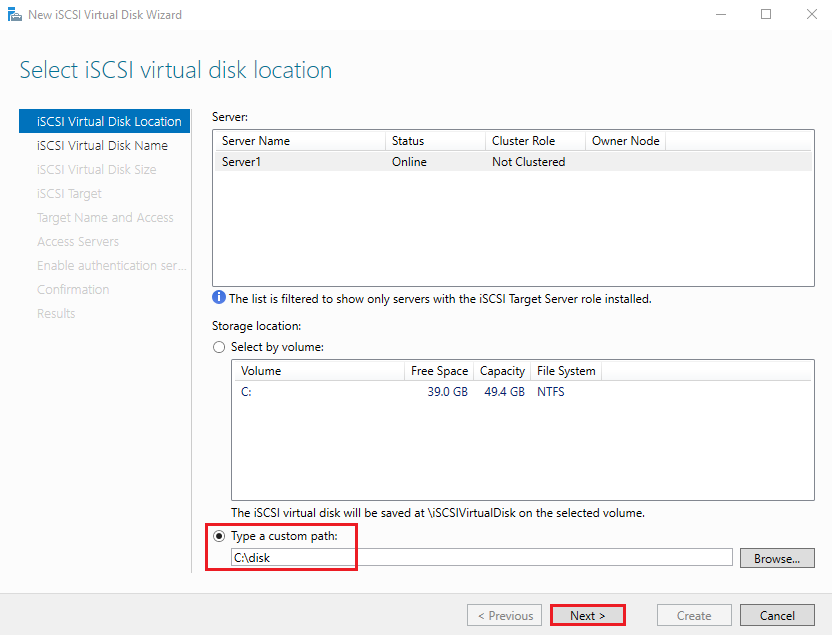
2. Select iSCSI virtual disk location
Select Type a custom path and browse for the folder we created earlier and click Next.
- Custom path: c:\disk
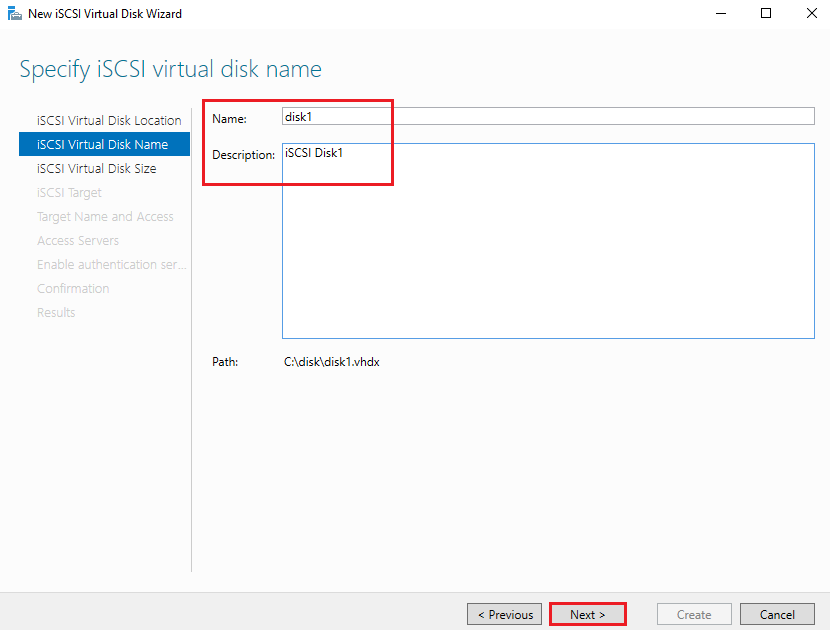
3. Specify the iSCSI virtual disk name
Enter the Name and Description for the virtual disk and click Next.
- Name: disk1
- Description: iSCSI Disk1
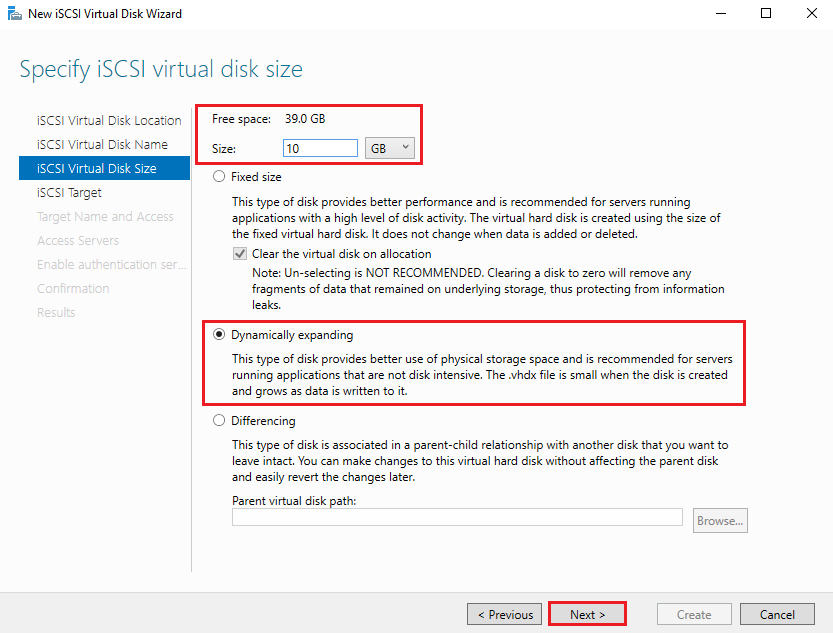
4. Specify iSCSI virtual disk size
Specify the disk size for the virtual disk, Select Dynamically expanding and click Next.
- Size: 10GB
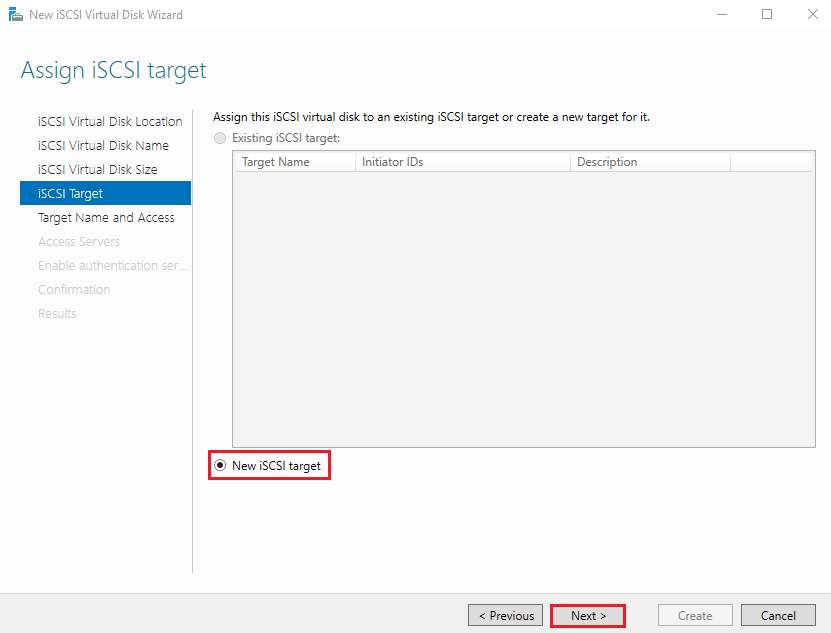
5. Assign iSCSI target
Select New iSCSI target and click Next.
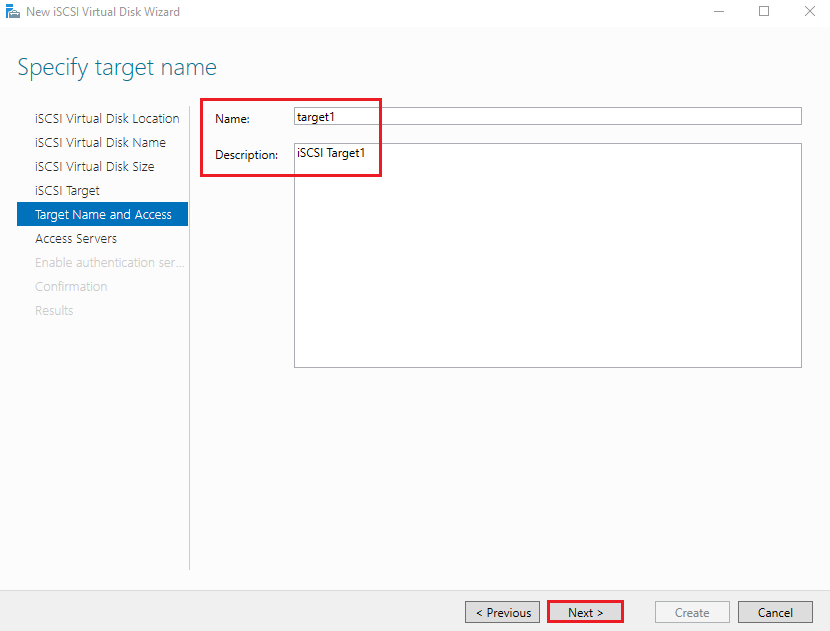
6. Specify target name
Enter the Name and Description for iSCSI Target and click Next.
- Name: target1
- Description: iSCSI Target1
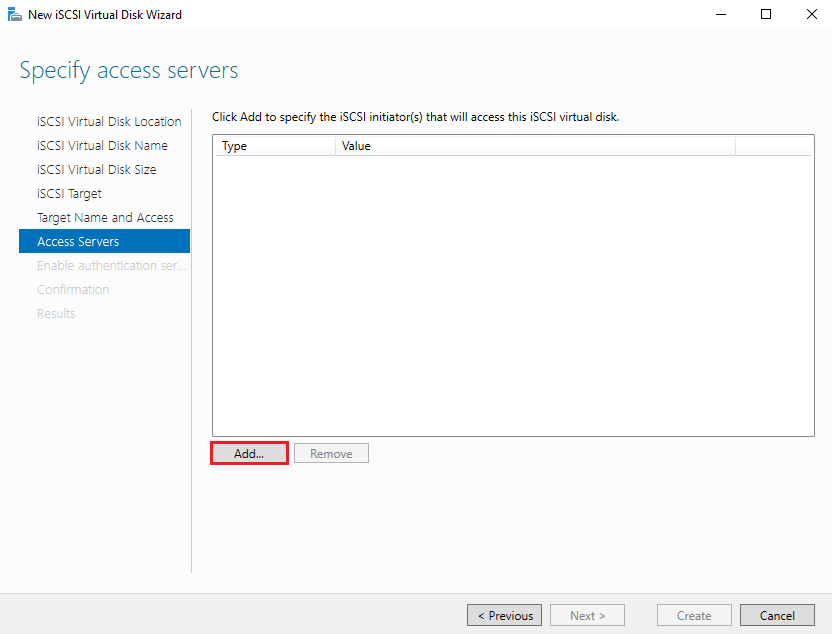
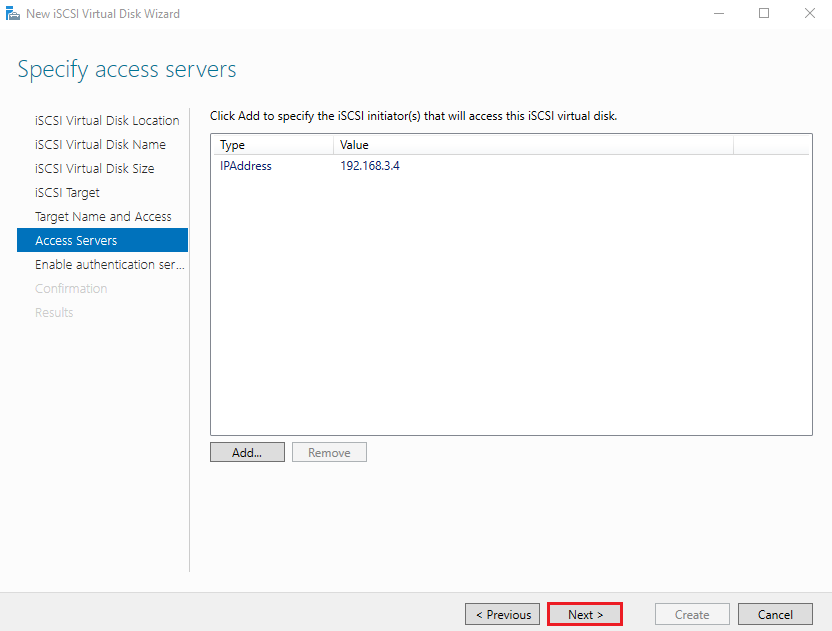
7. Specify access servers
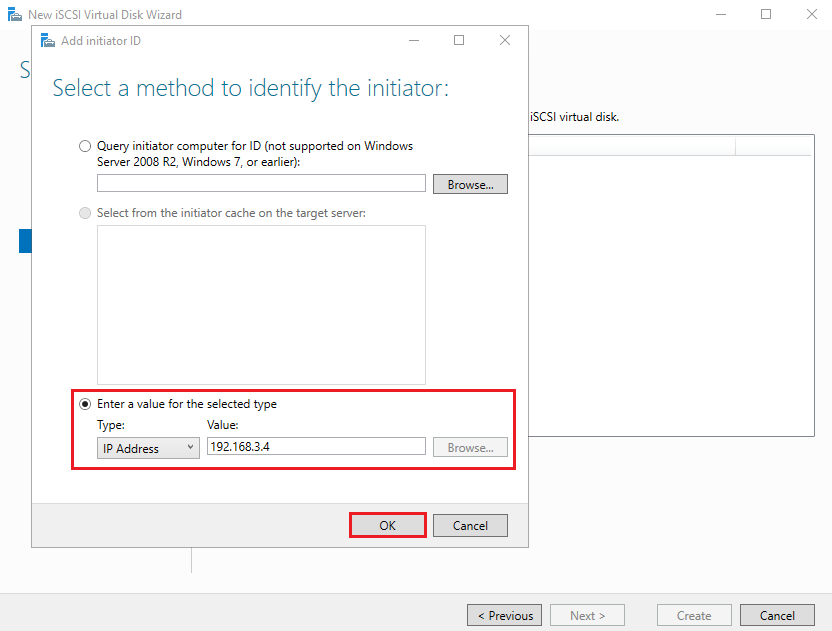
Click Add to specify the iSCSI initiator that will access this iSCSI virtual disk.
Select Enter a value for the selected type, choose IP Address from the drop-down menu, enter Initiator IP Address and click OK.
- Initiator IP Address:192.168.3.4
Click Next to continue.
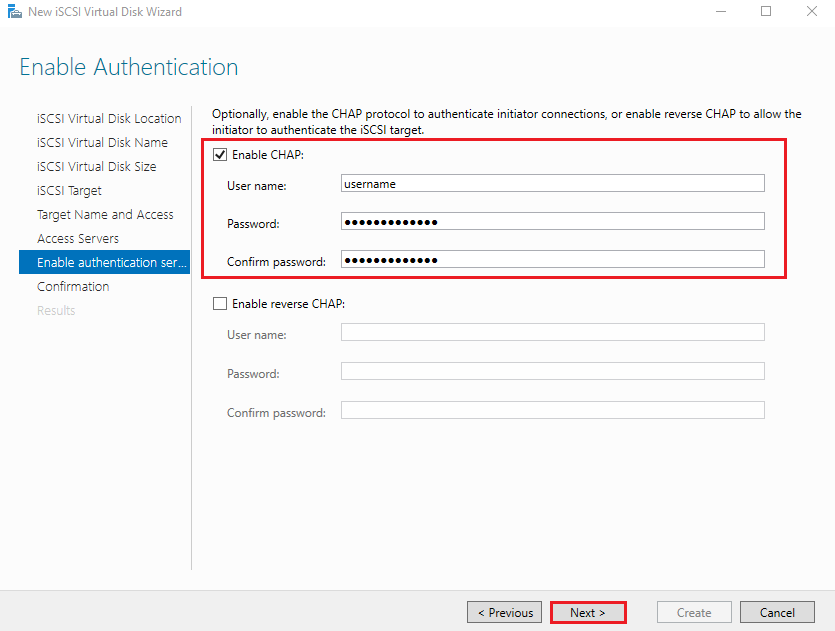
8. Enable Authentication
Select Enable CHAP, set username and password, and click Next.
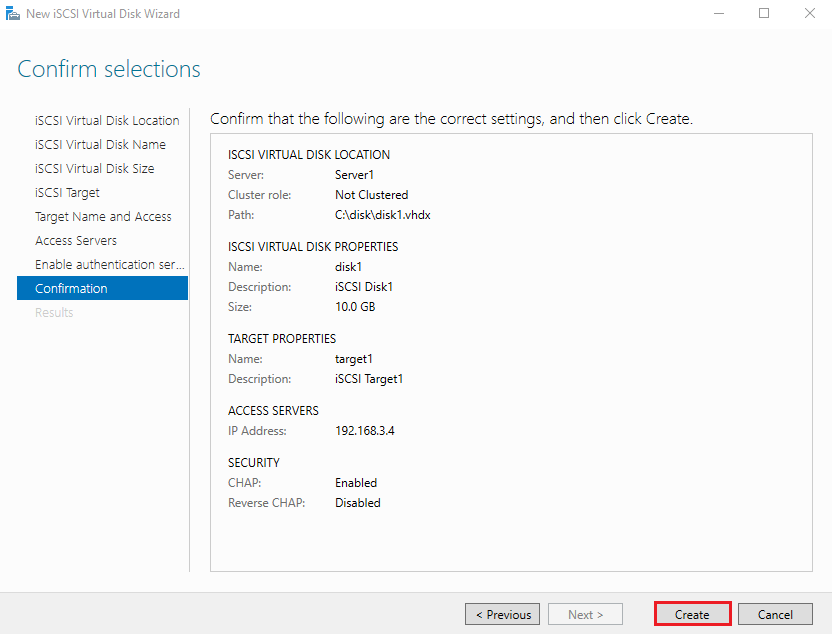
9. Confirm selections
Confirm selections and click Create.
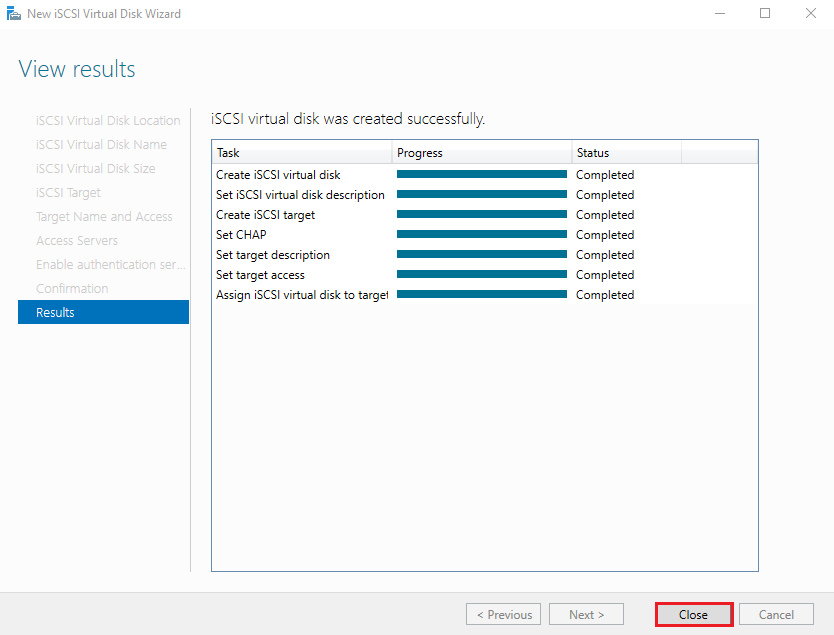
10. View Results
After finishing the installation, click Close.
Configure iSCSI initiator
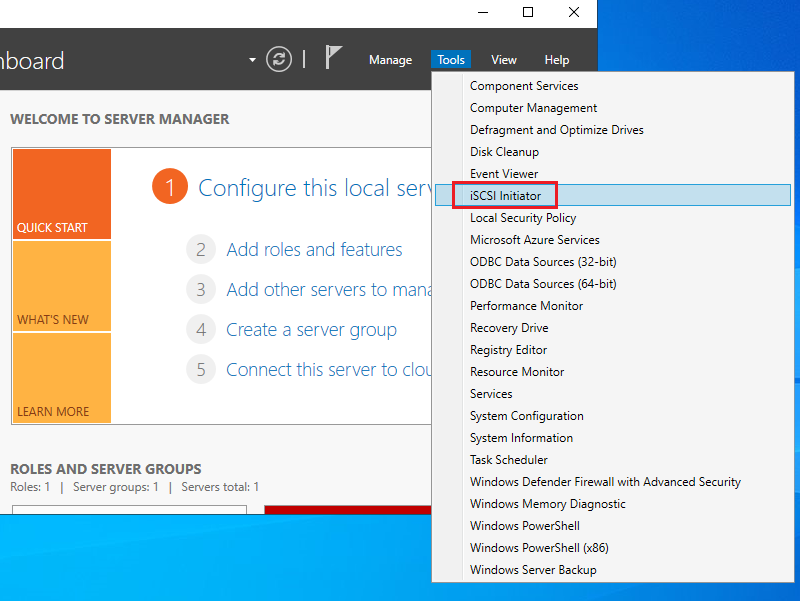
Open the Server Manager dashboard click Tools and select iSCSI Initiator.
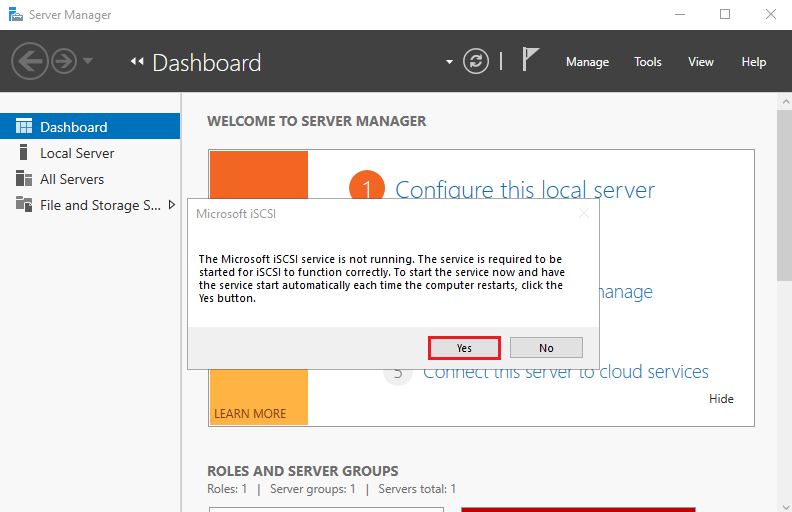
Click Yes to continue.
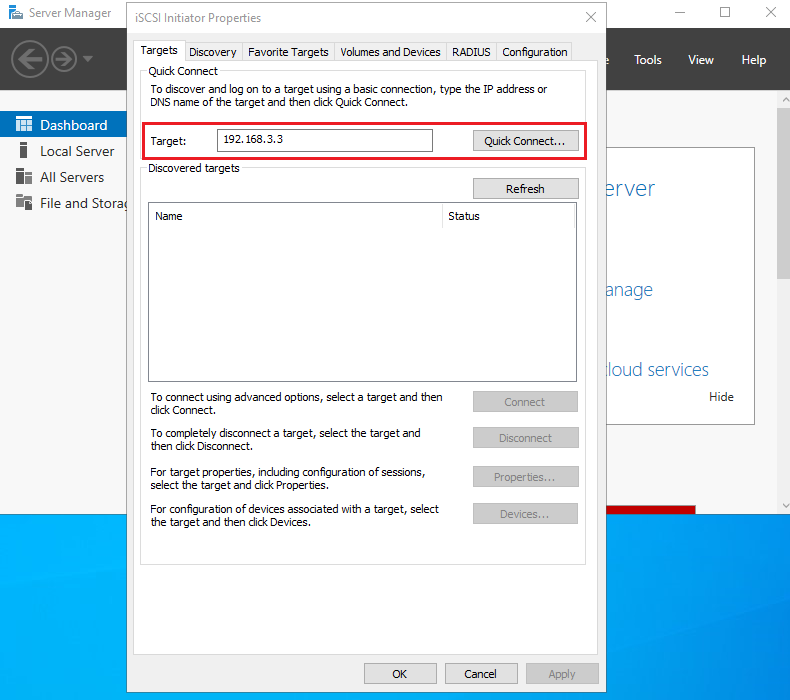
Enter Target’s IP address and click Quick Connect.
- Target: 192.168.3.3
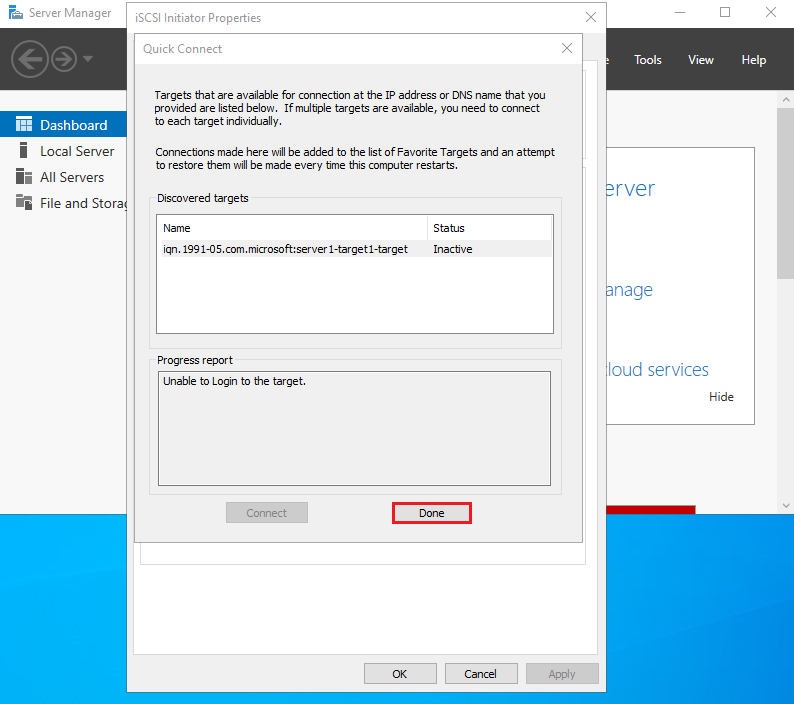
Click Done.
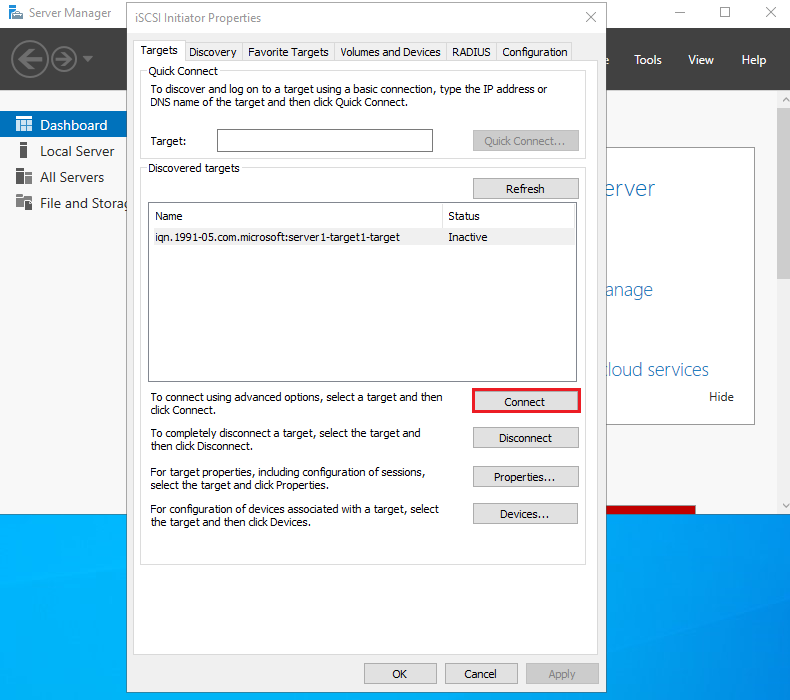
Click Connect.
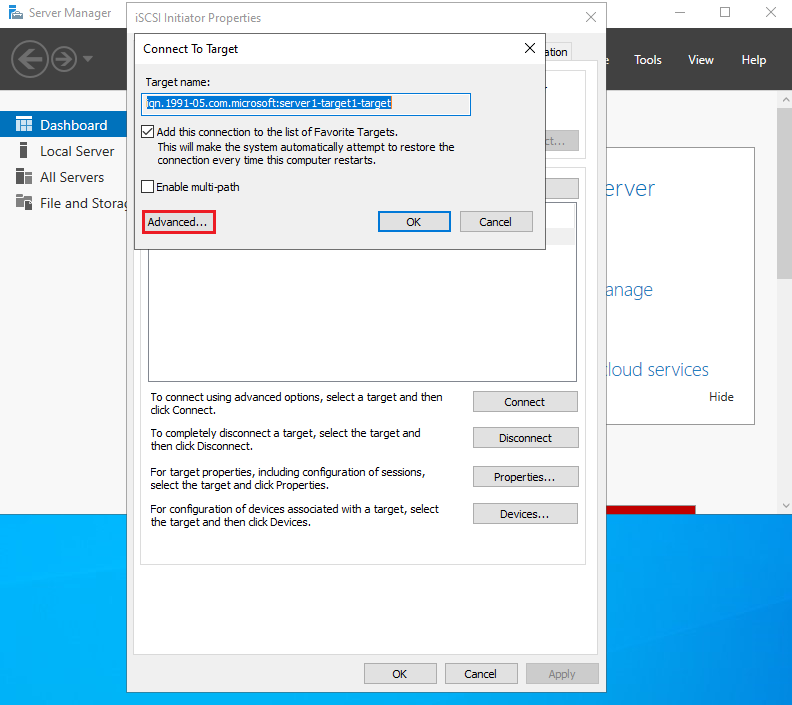
Click Advanced.
Enable CHAP log on, set username & password, and Click OK.
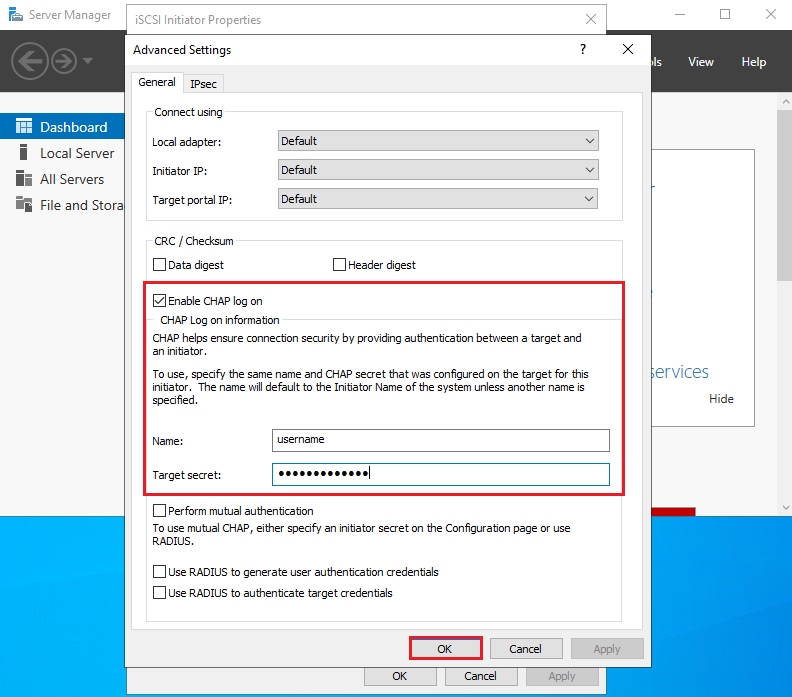
Click OK.
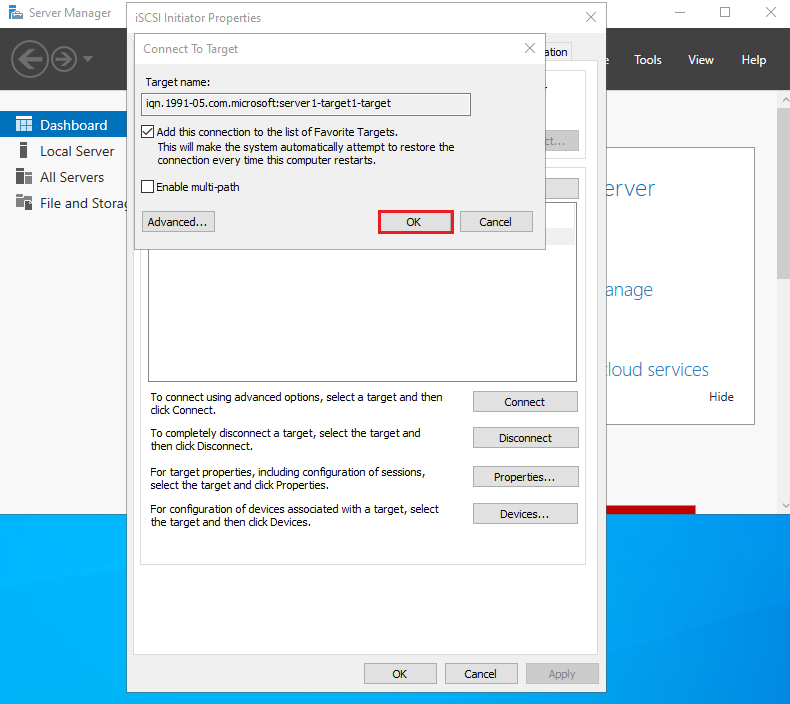
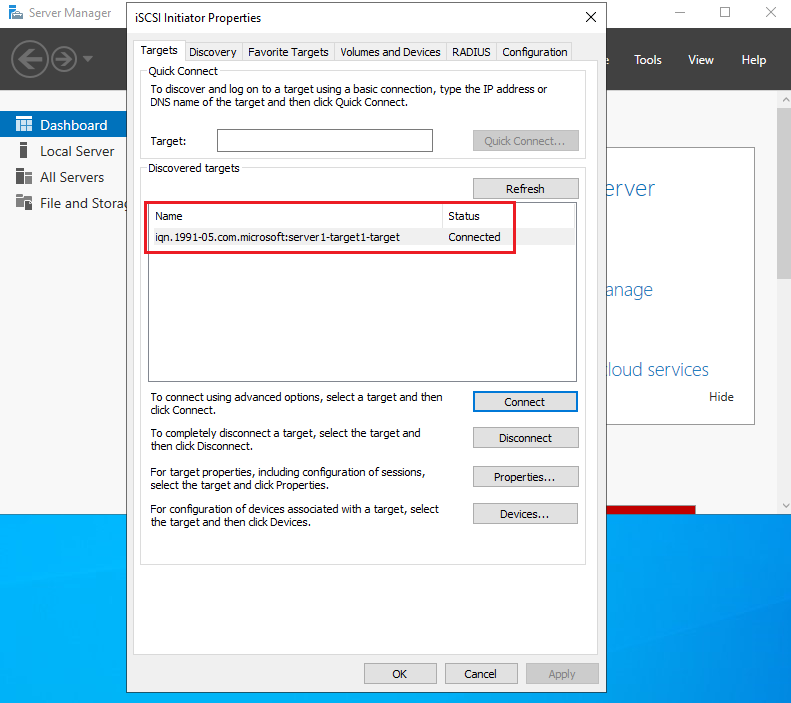
Check the Status.
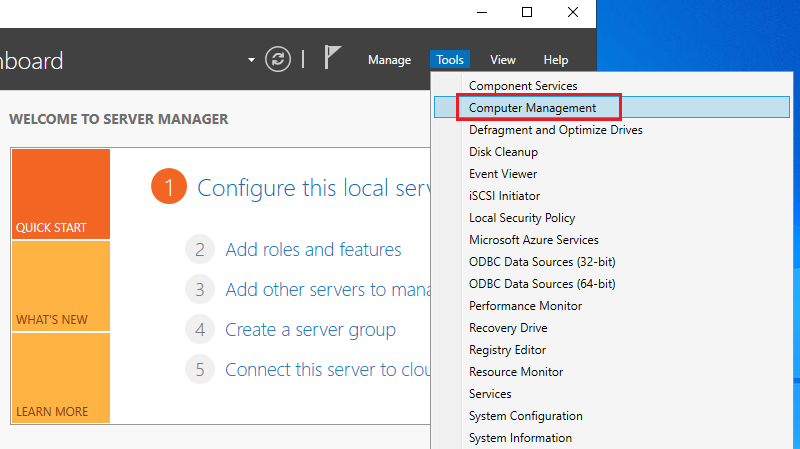
Open the Server Manager dashboard, click Tools and select Computer Management.
Click Disk Management, the iSCSI Disk has been attached as follows.
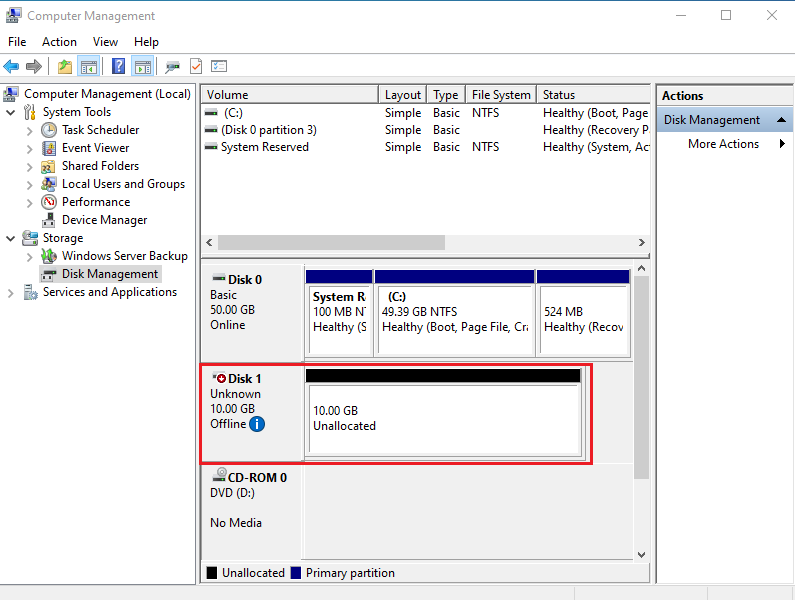
To use the iSCSI Disk turn it online and initialize it and then assign the drive letter.
