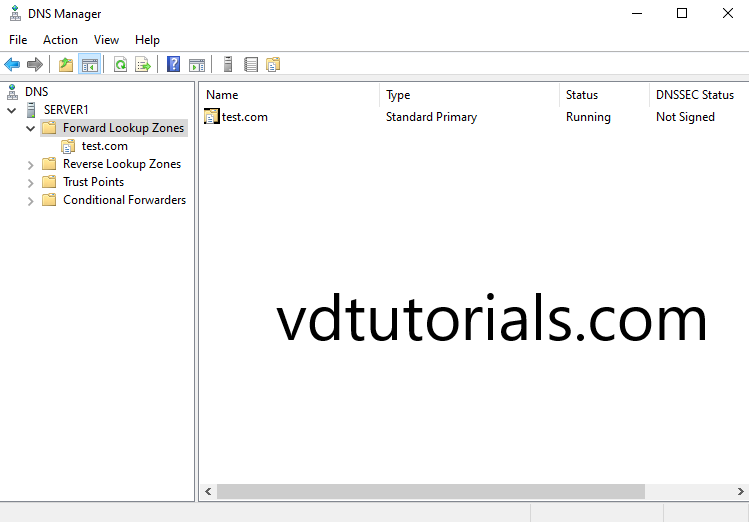
This step by step tutorial covers how to Create a DNS (Domain Name System) Forward Lookup Zone in Windows Server 2022. Forward Lookup Zones resolve FQDN and other host names to IP address, Resource records in forward lookup zones include A, MX, SRV, and CNAME Records.
Prerequisite Required
- Install Domain Name System
Related tutorial
Demo environment
- Computer Name: server1
- Operating System: Windows Server 2022 Datacenter
- IP Address: 192.168.3.3
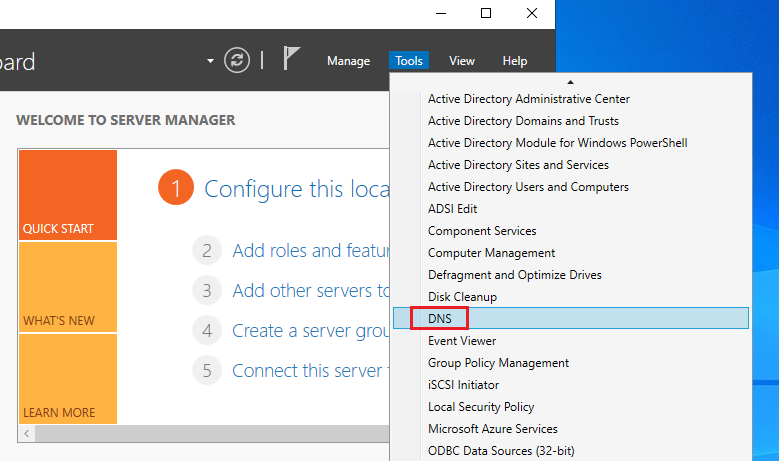
1. Open the Server Manager dashboard click Tools and select DNS.
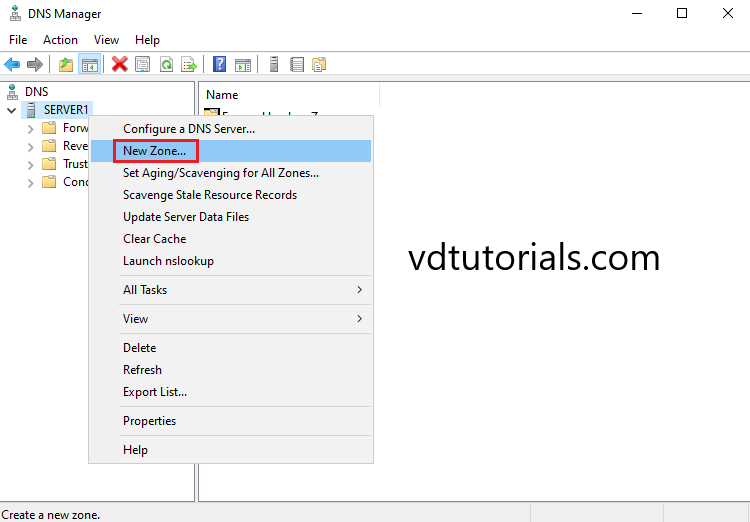
2. Right Click on DNS Server and click New Zone.
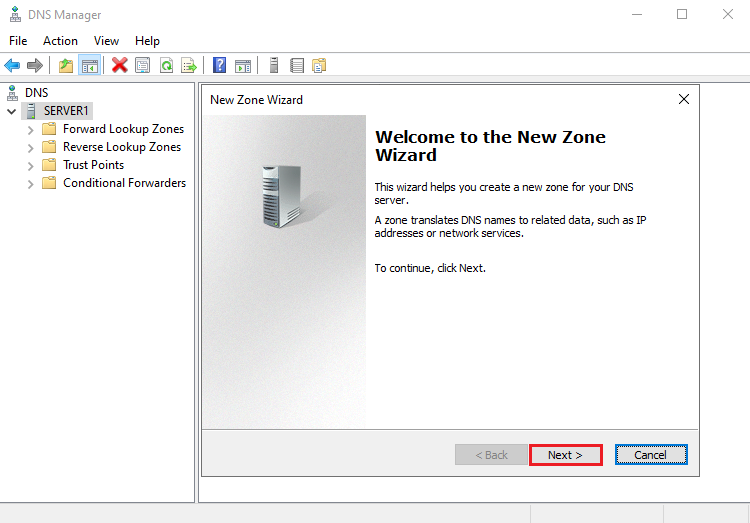
3. To continue, click Next.
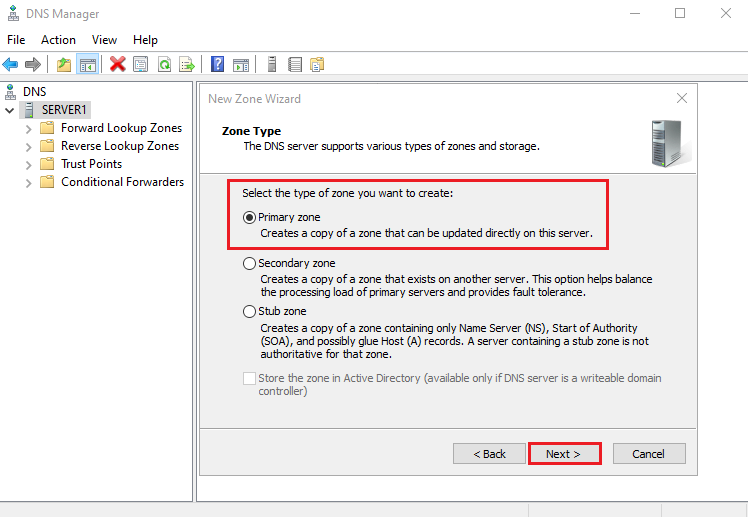
4. In Zone type selection, select the Primary zone and click Next.
The primary zone creates a copy of a zone that can be updated directly on this server.
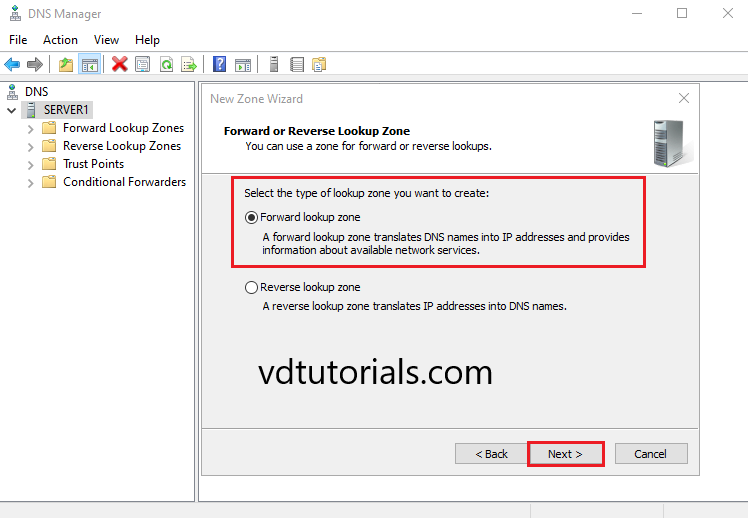
5. Select Forward Lookup Zone and click Next.
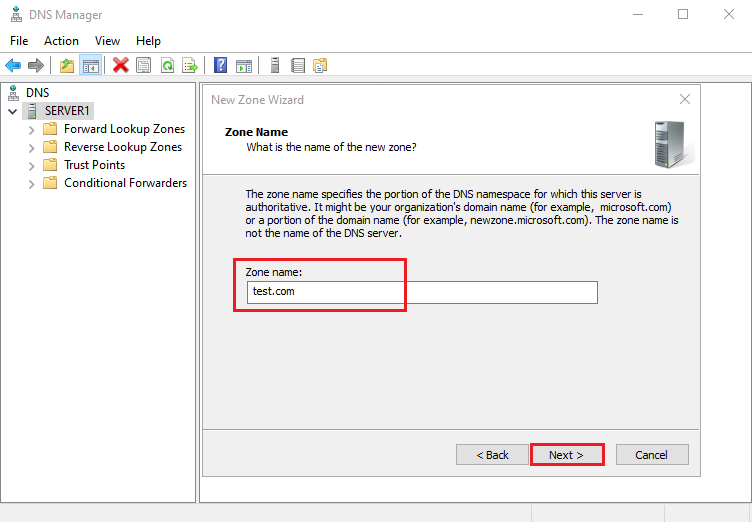
6. Enter Forward Lookup Zone name and click Next.
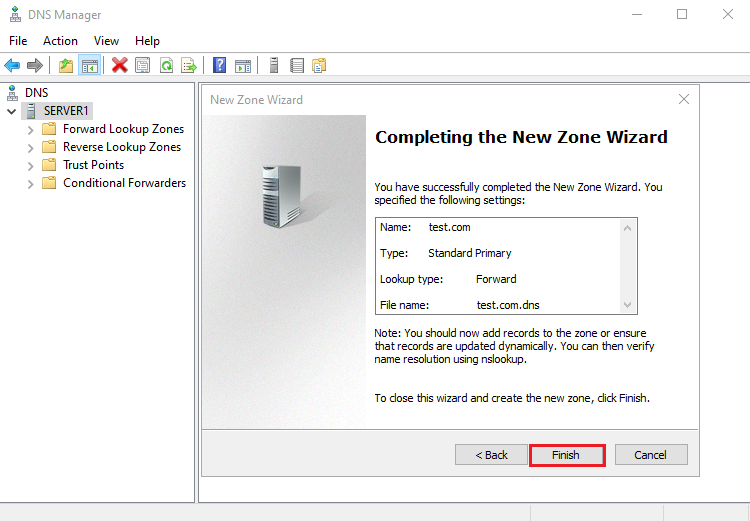
Zone Name: test.com
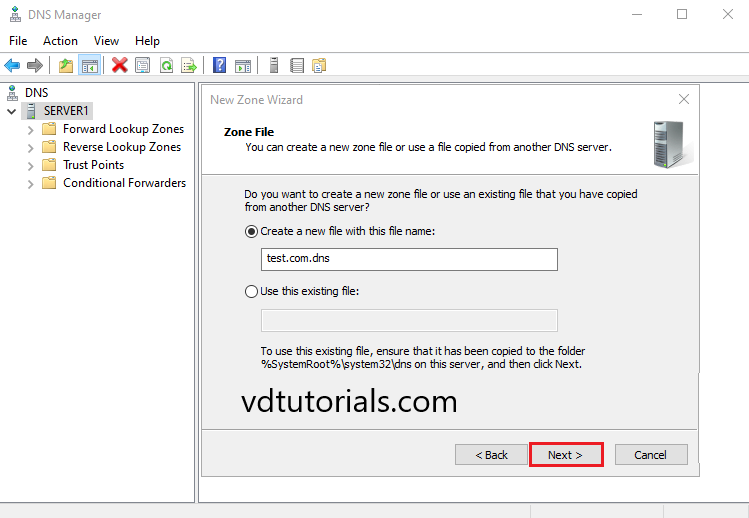
7. In Zone File, Click Next.
Create a new file or use an existing file that you have copied from another DNS server. In this tutorial, we create a new file with the file name test.com.dns
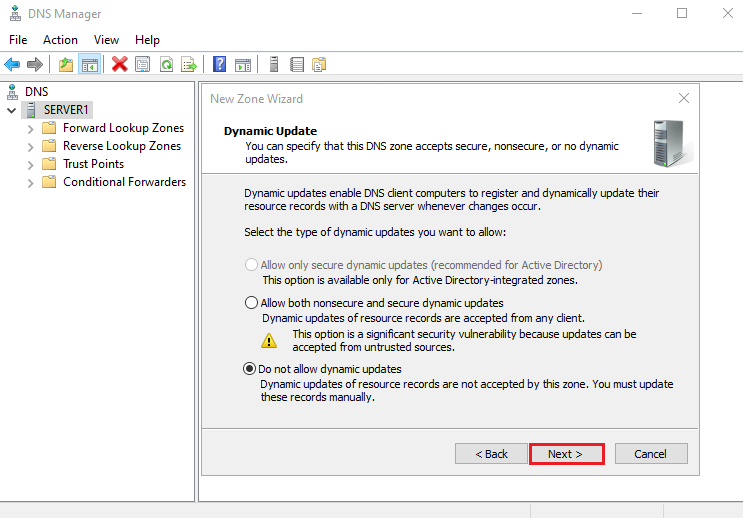
8. Do not allow dynamic updates and Click Next.
9. To close this wizard and create the new zone, click Finish.
10. A new zone has been created under the Forward Lookup Zone.
